Welcome to ORE2B!
This guide will walk you through every step of using the ORE2B International Mining B2B Marketplace. Explore each screenshot and discover how to register, set up your profile, create listings, and manage your account.
Registering Your Account

Sign Up Easily
Start by visiting the registration page. Fill in your basic information to begin creating your account. The process is quick and straightforward, ensuring a hassle-free onboarding experience.
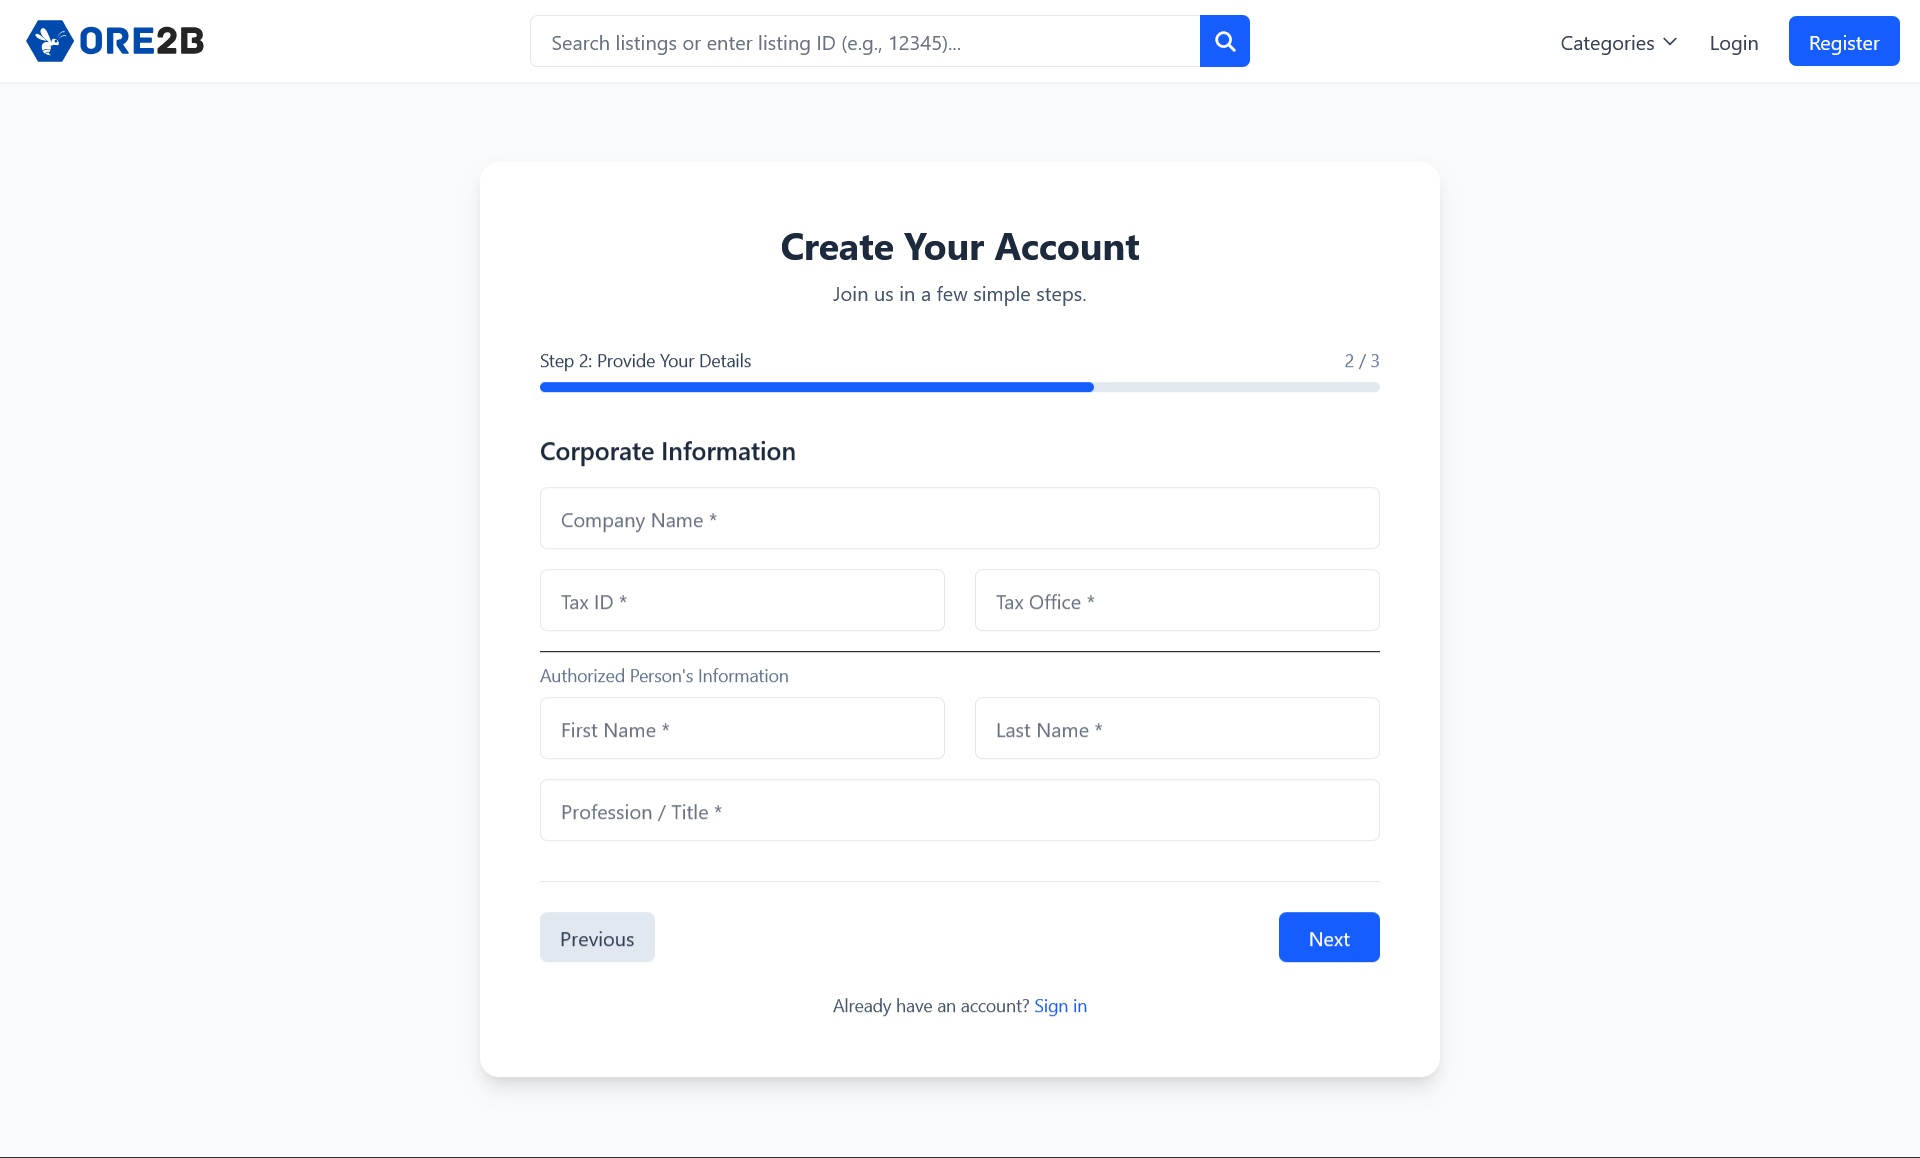
Corporate Registration
If you represent a company, choose the 'Corporate' option and provide your business details. This ensures your company profile is set up for professional trading and networking.
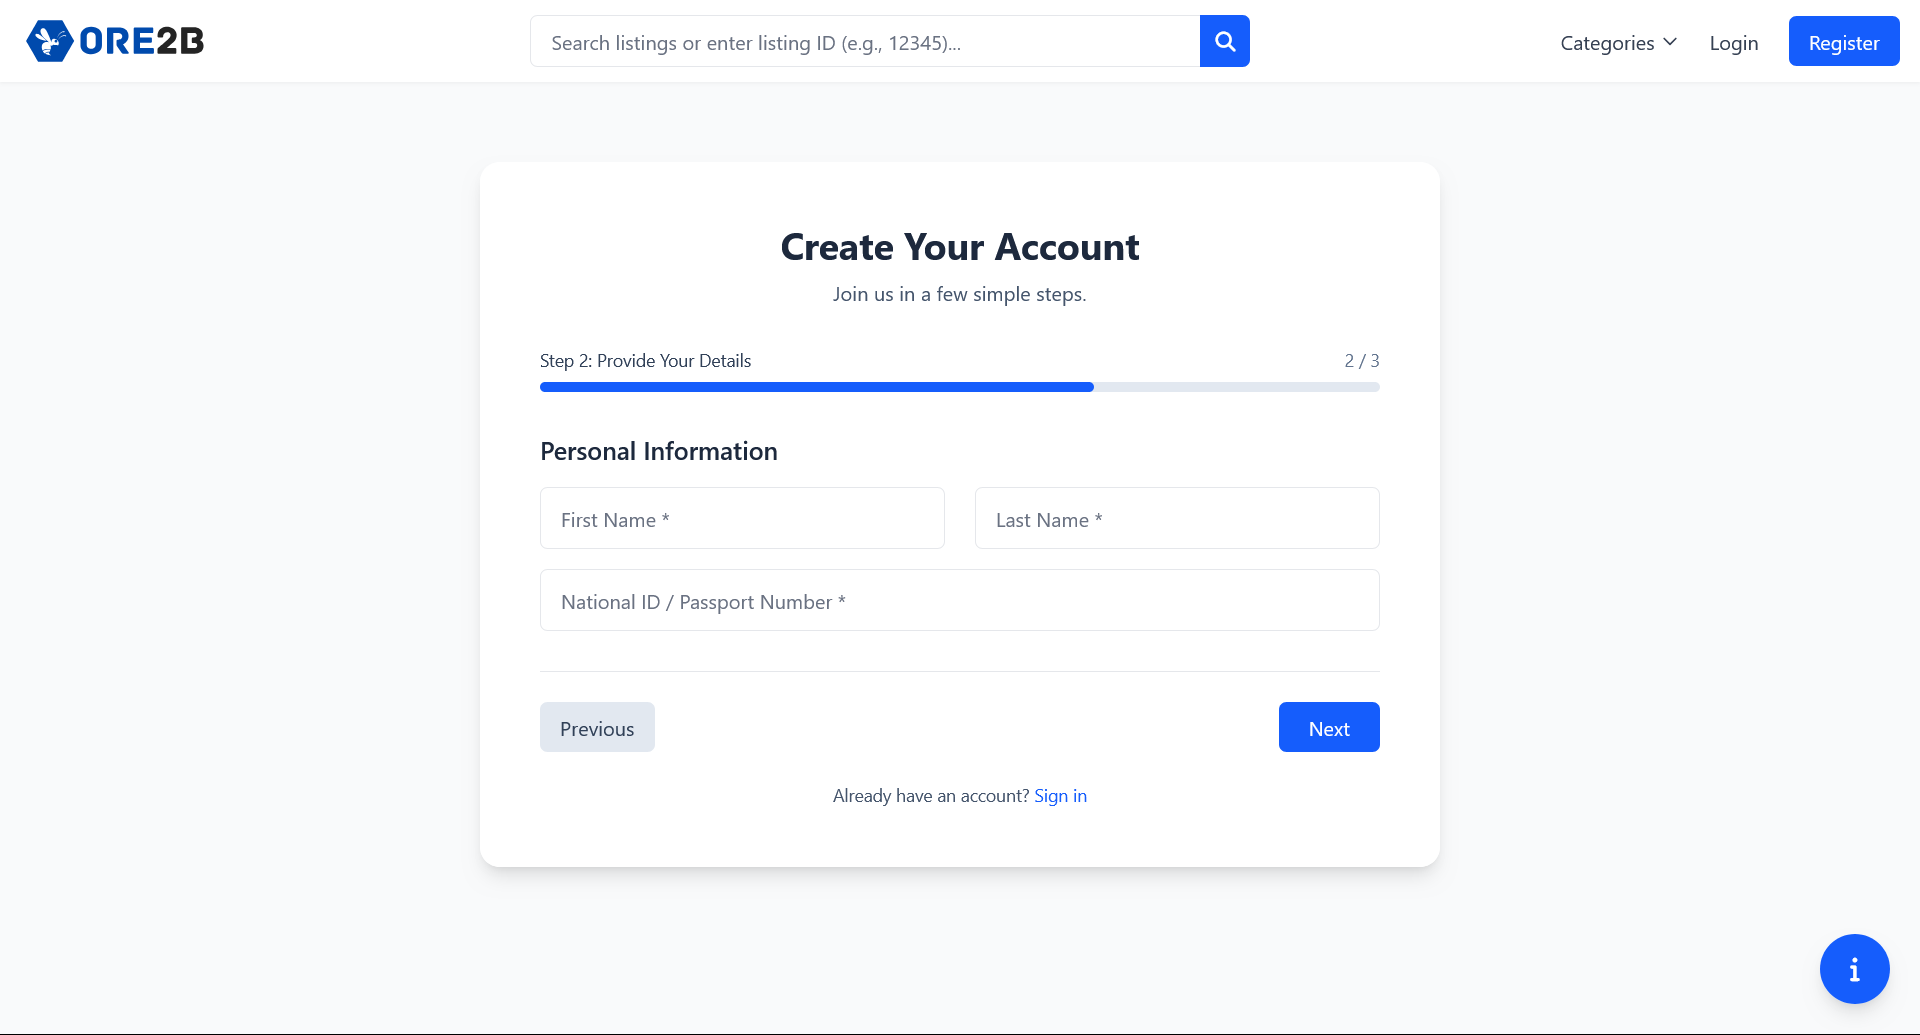
Personal Registration
Individual traders can select the 'Personal' option. Enter your details to quickly start buying or selling minerals as an independent member.
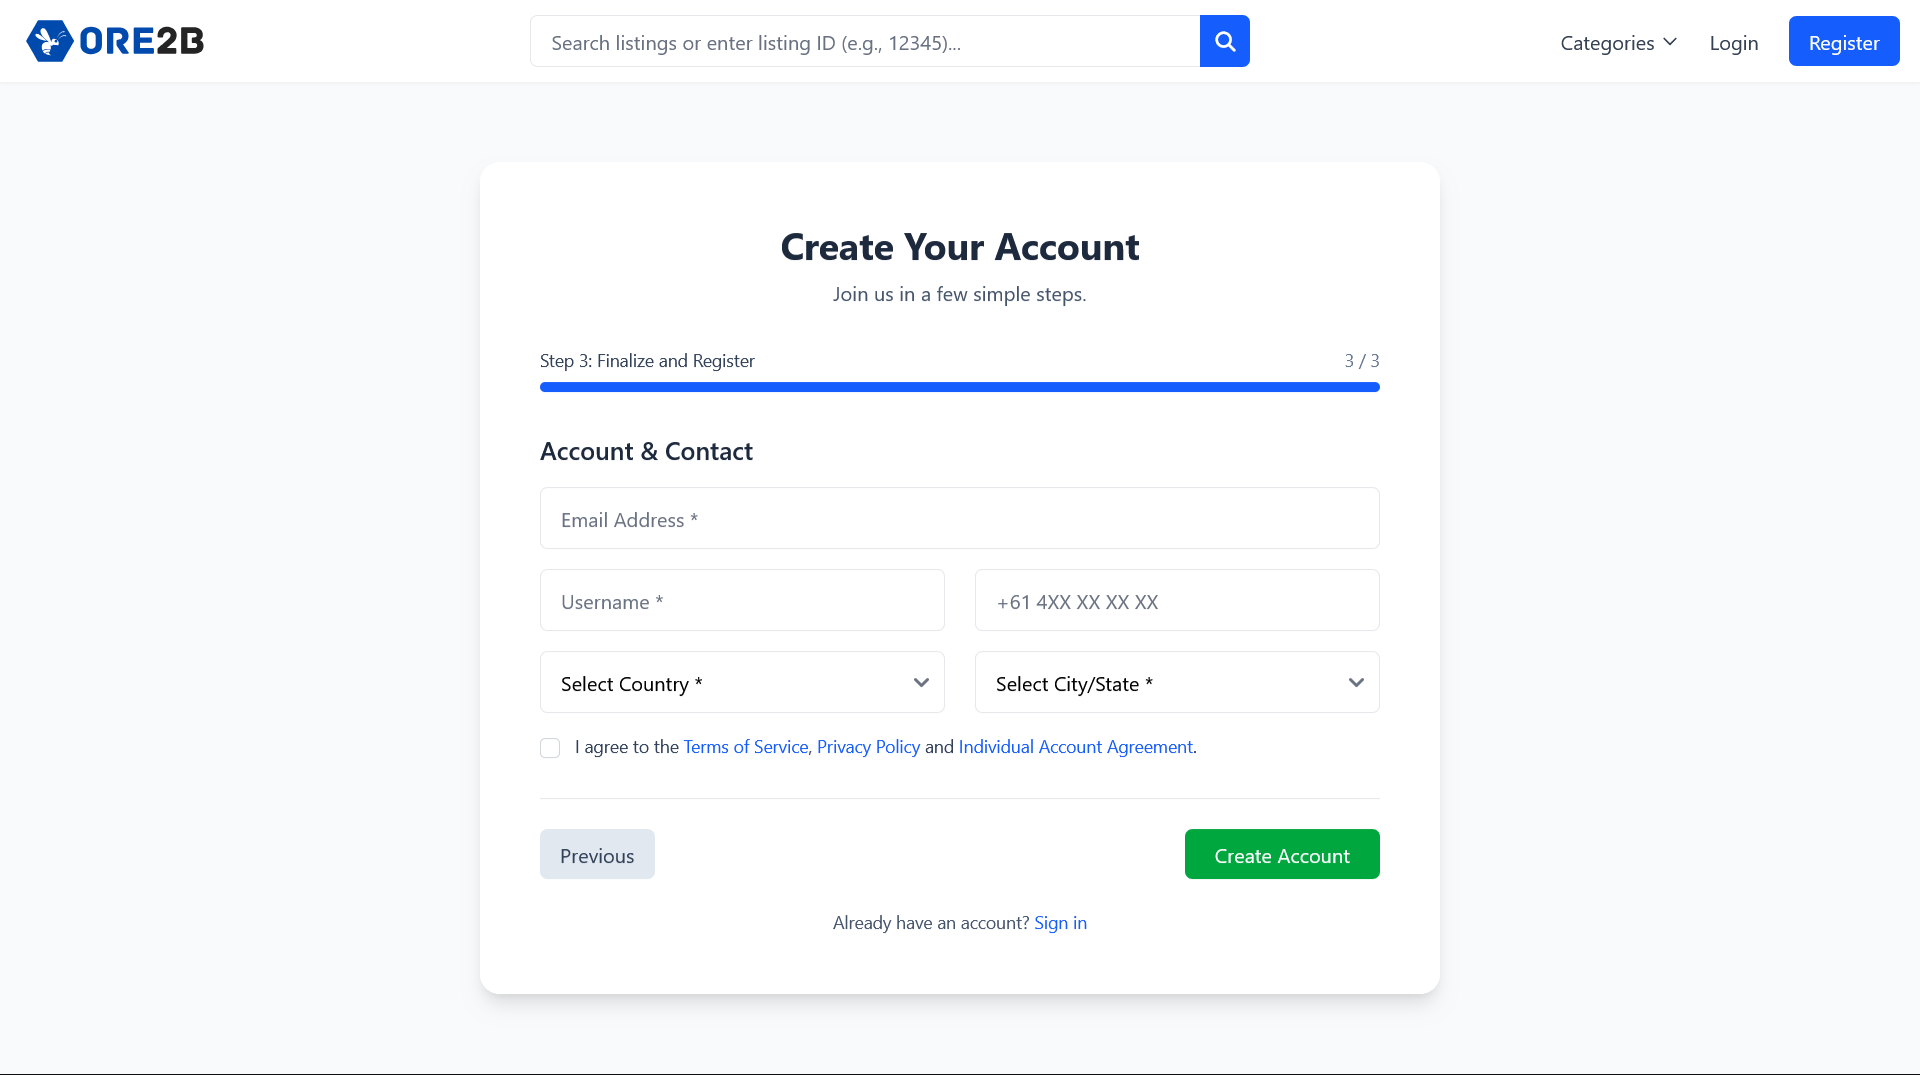
Complete Your Registration
Finish your registration by providing any remaining information. Once submitted you’ll get started.
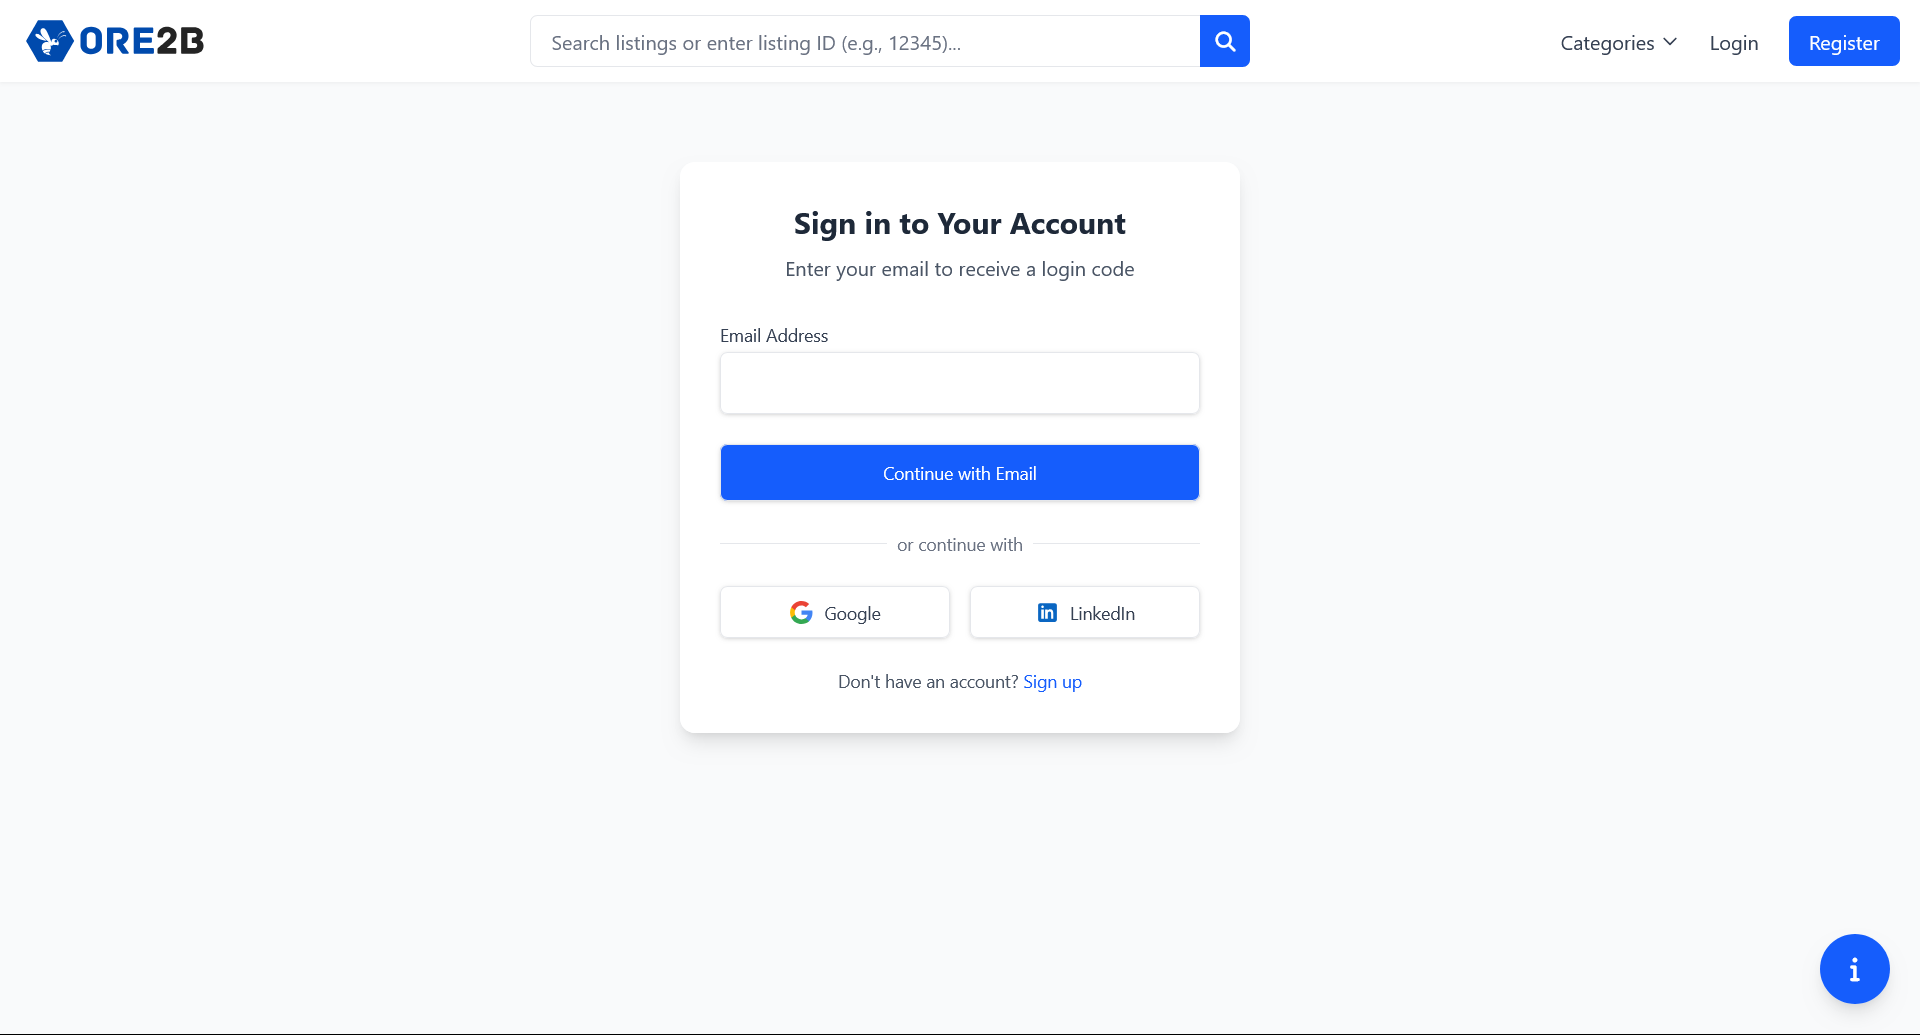
Logging Into Your Account
Use your registered email to log in securely. Access to our website is linked to your email address. ORE2B will never save your passwords. When you register to log in, we will send a secure magic link and login code to the email address you provided. In addition, you can register and log in with Google or LinkedIn.
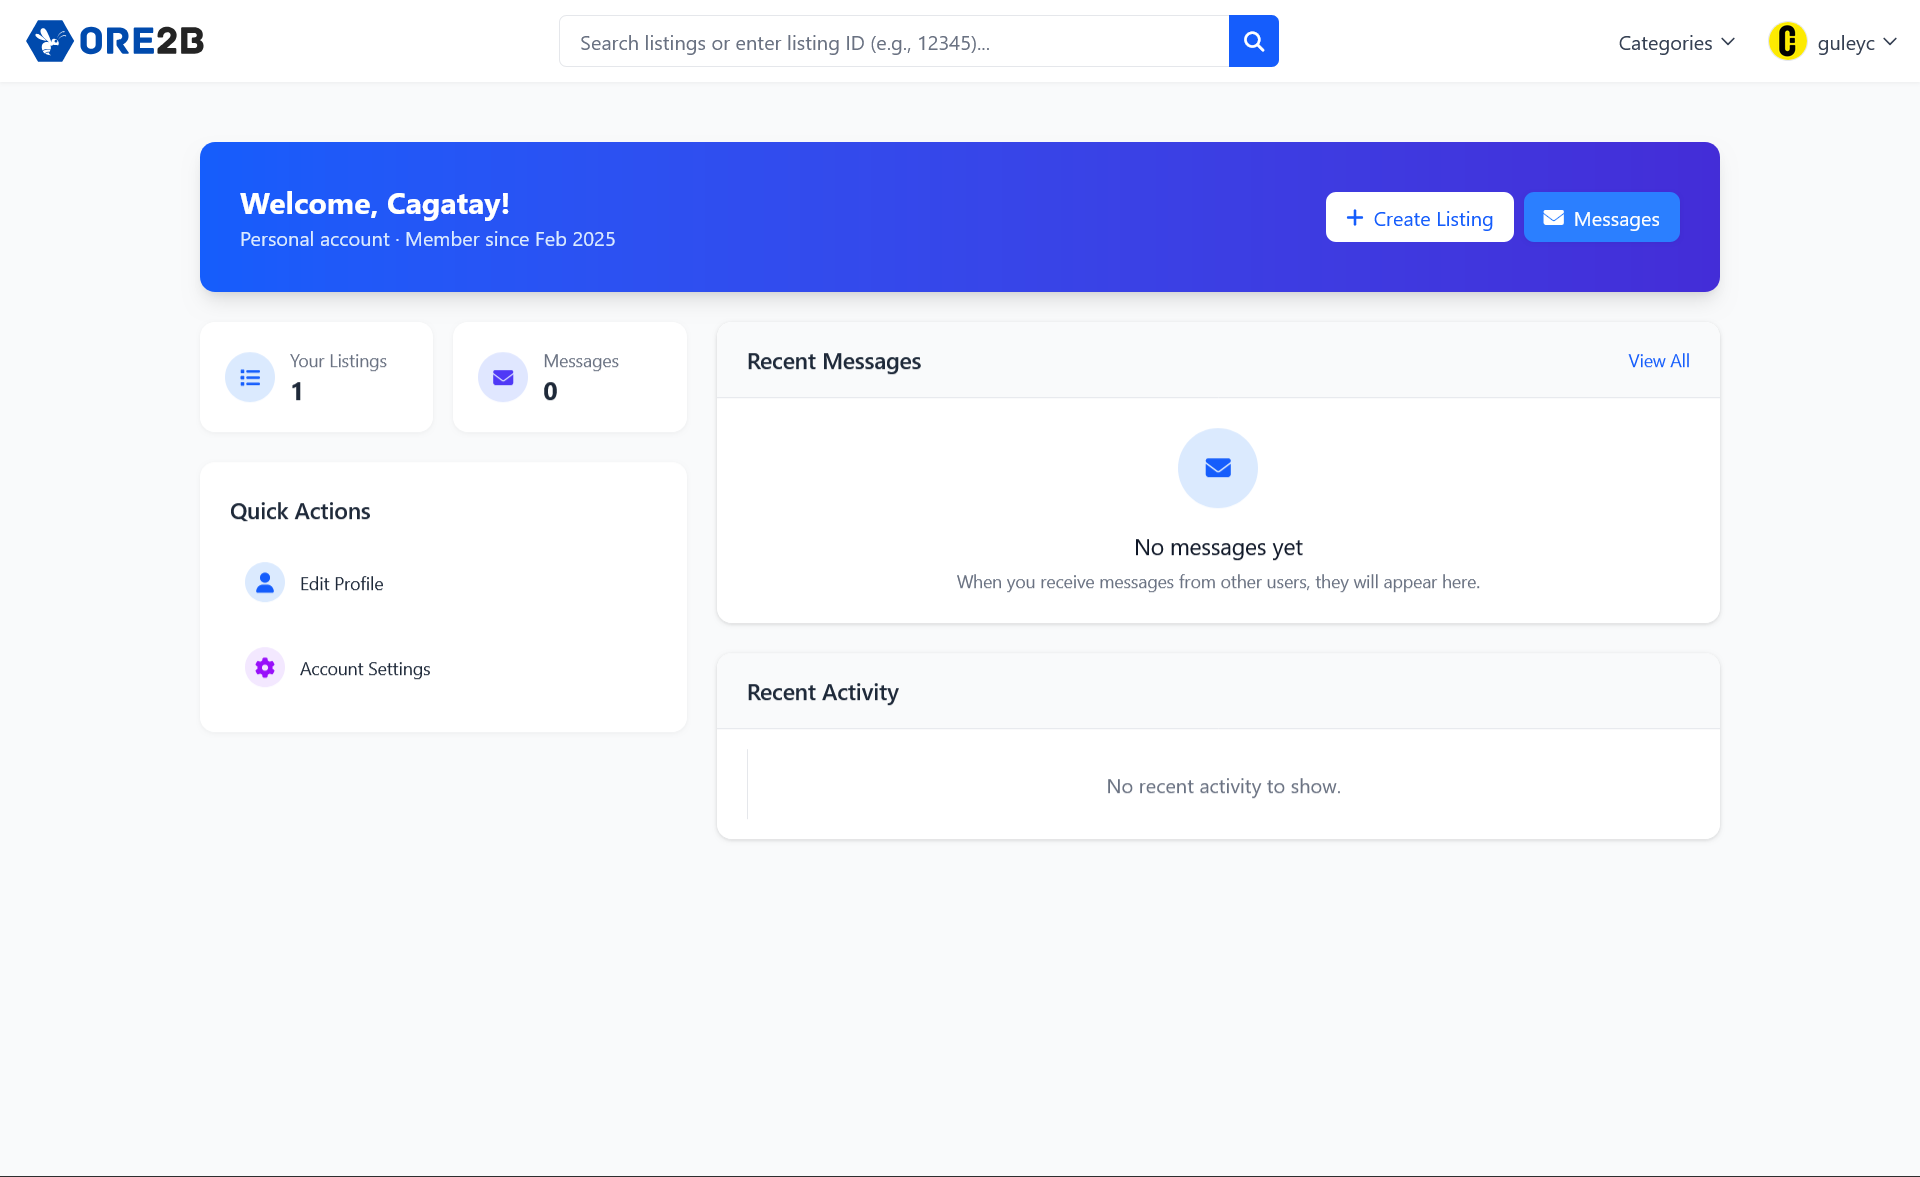
Navigating Your Dashboard
Your dashboard provides a complete overview of your activities. Easily manage your listings, track messages, and view account statistics from a single, user-friendly interface.
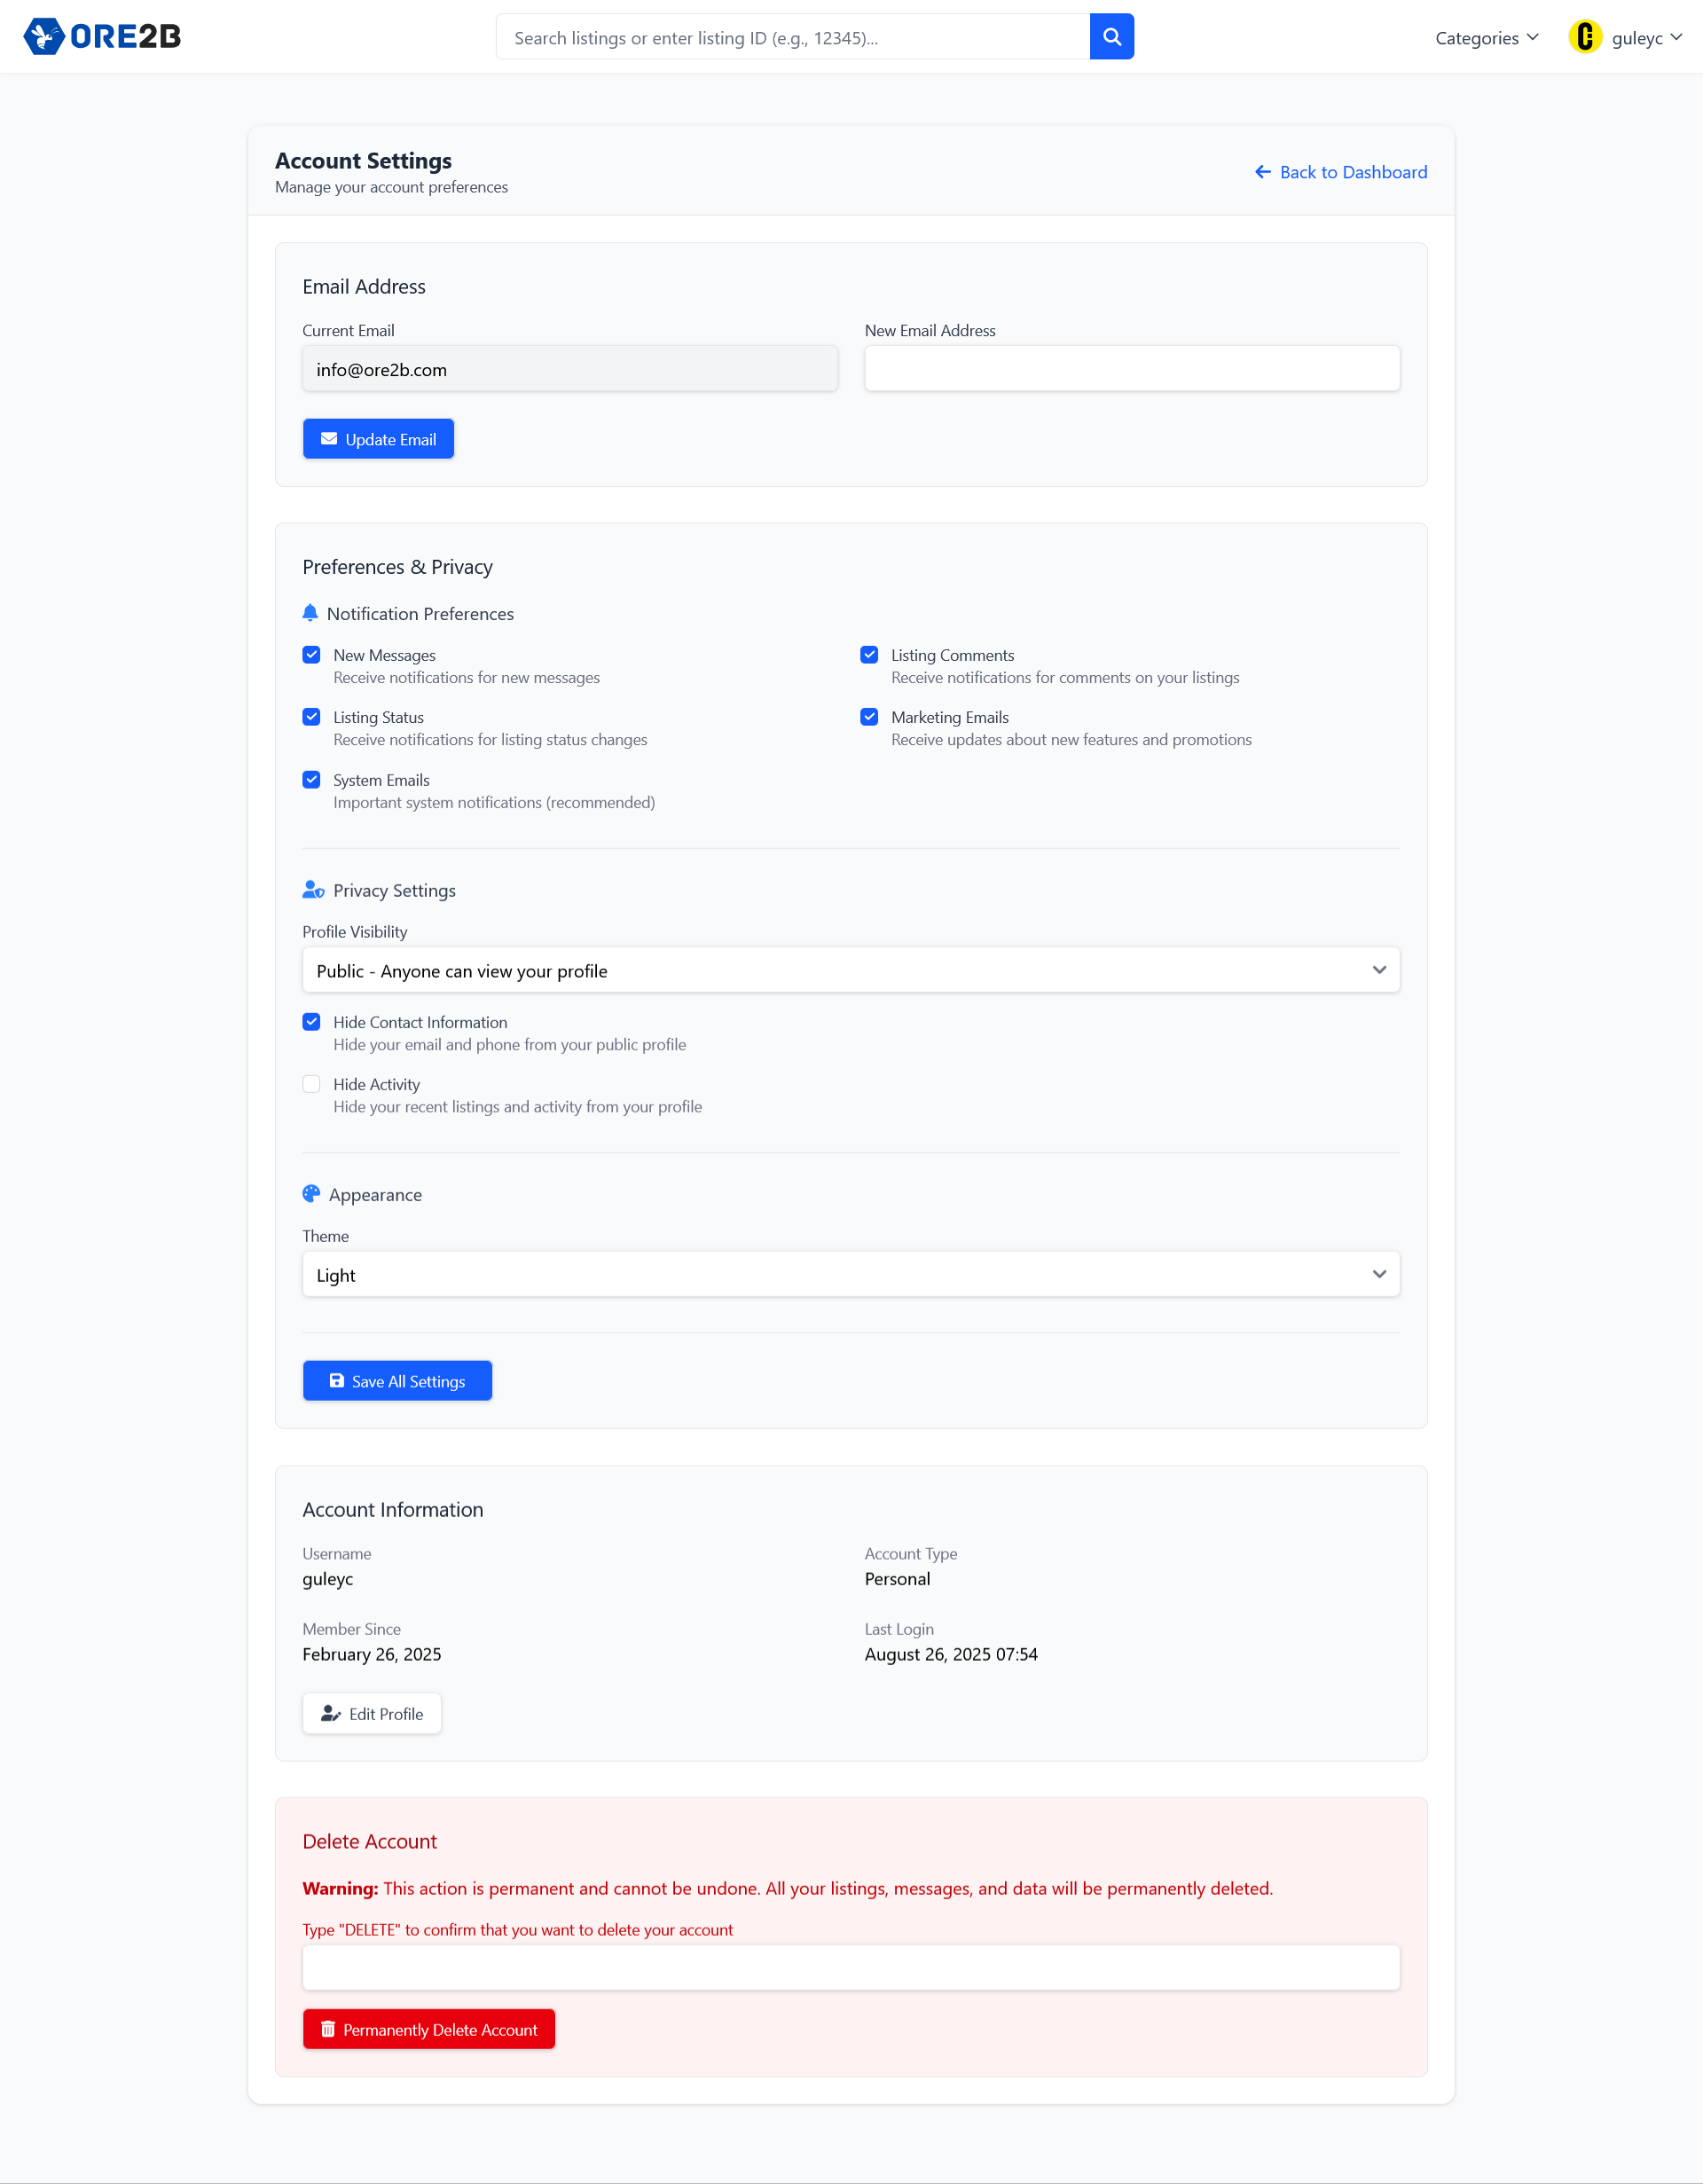
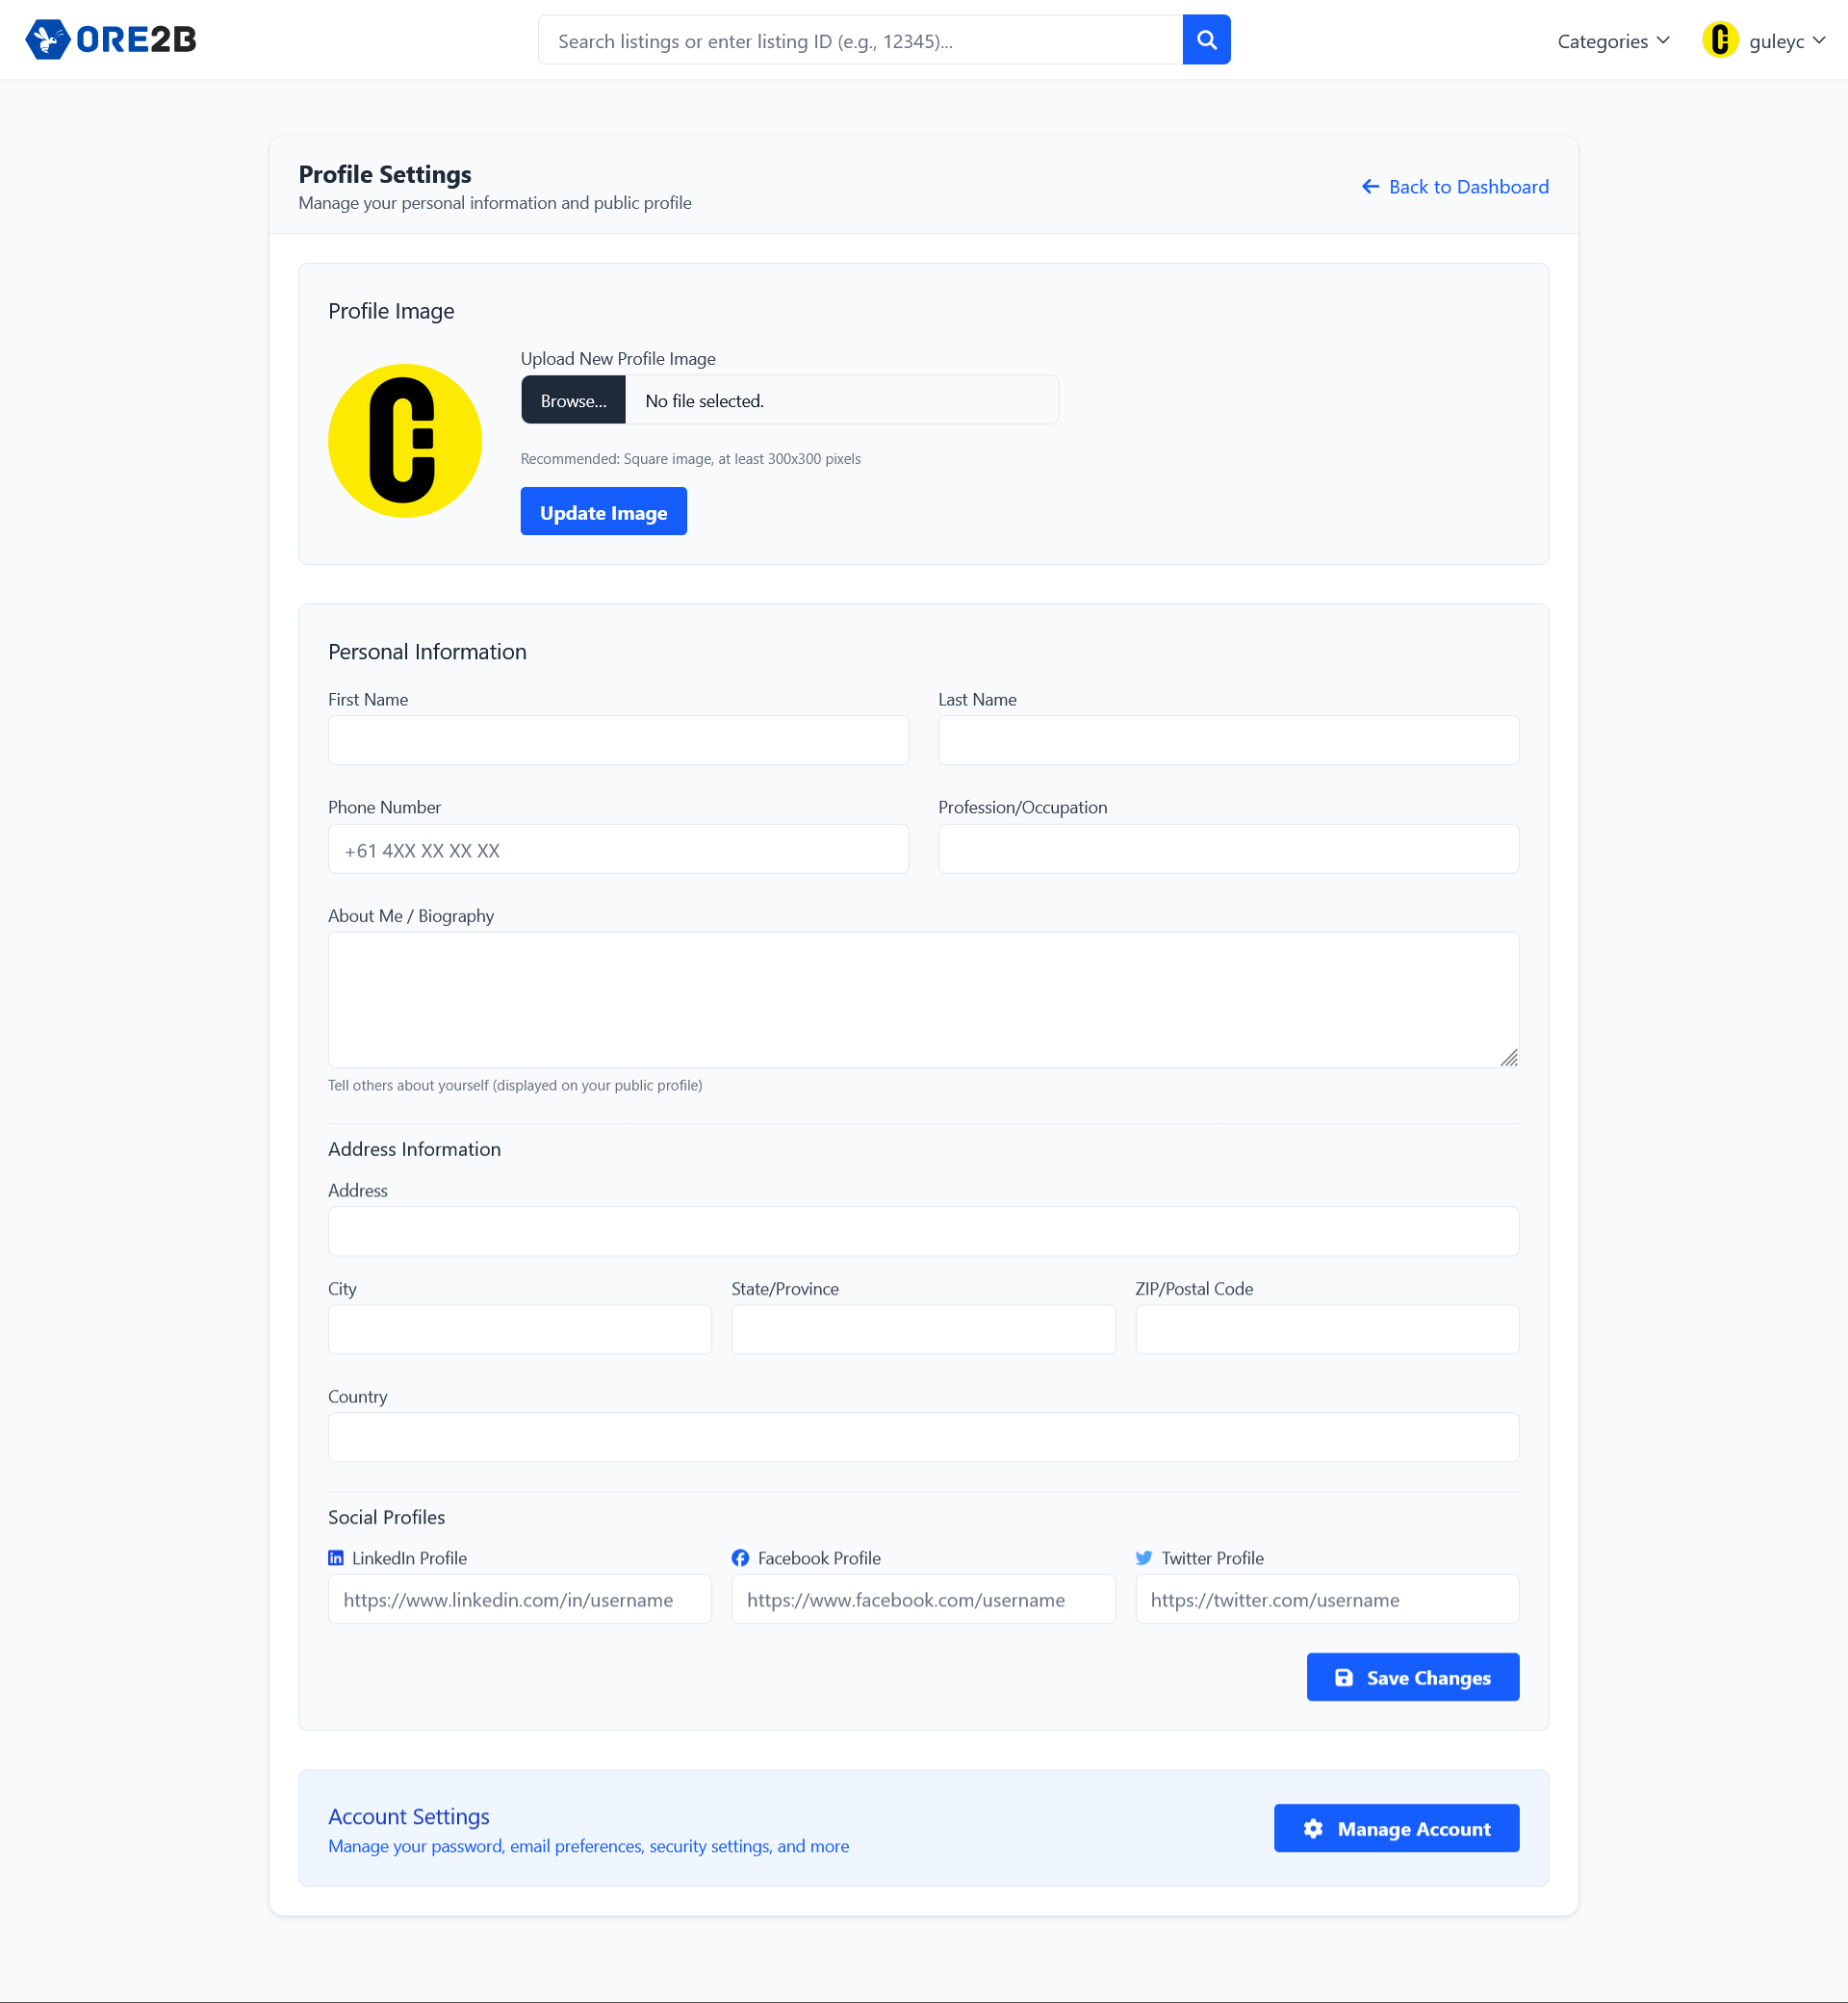
Updating Your Account & Profile
Access your account settings to update personal information, change your password, and adjust notification preferences.
Customize your profile to attract more partners by adding a logo, business details, and a brief description. A complete profile increases your visibility and trust on the platform.
Creating a New Listing
Easily list your minerals or metals for sale by following these intuitive steps. Each stage is designed to simplify the process and ensure your products reach the right audience.
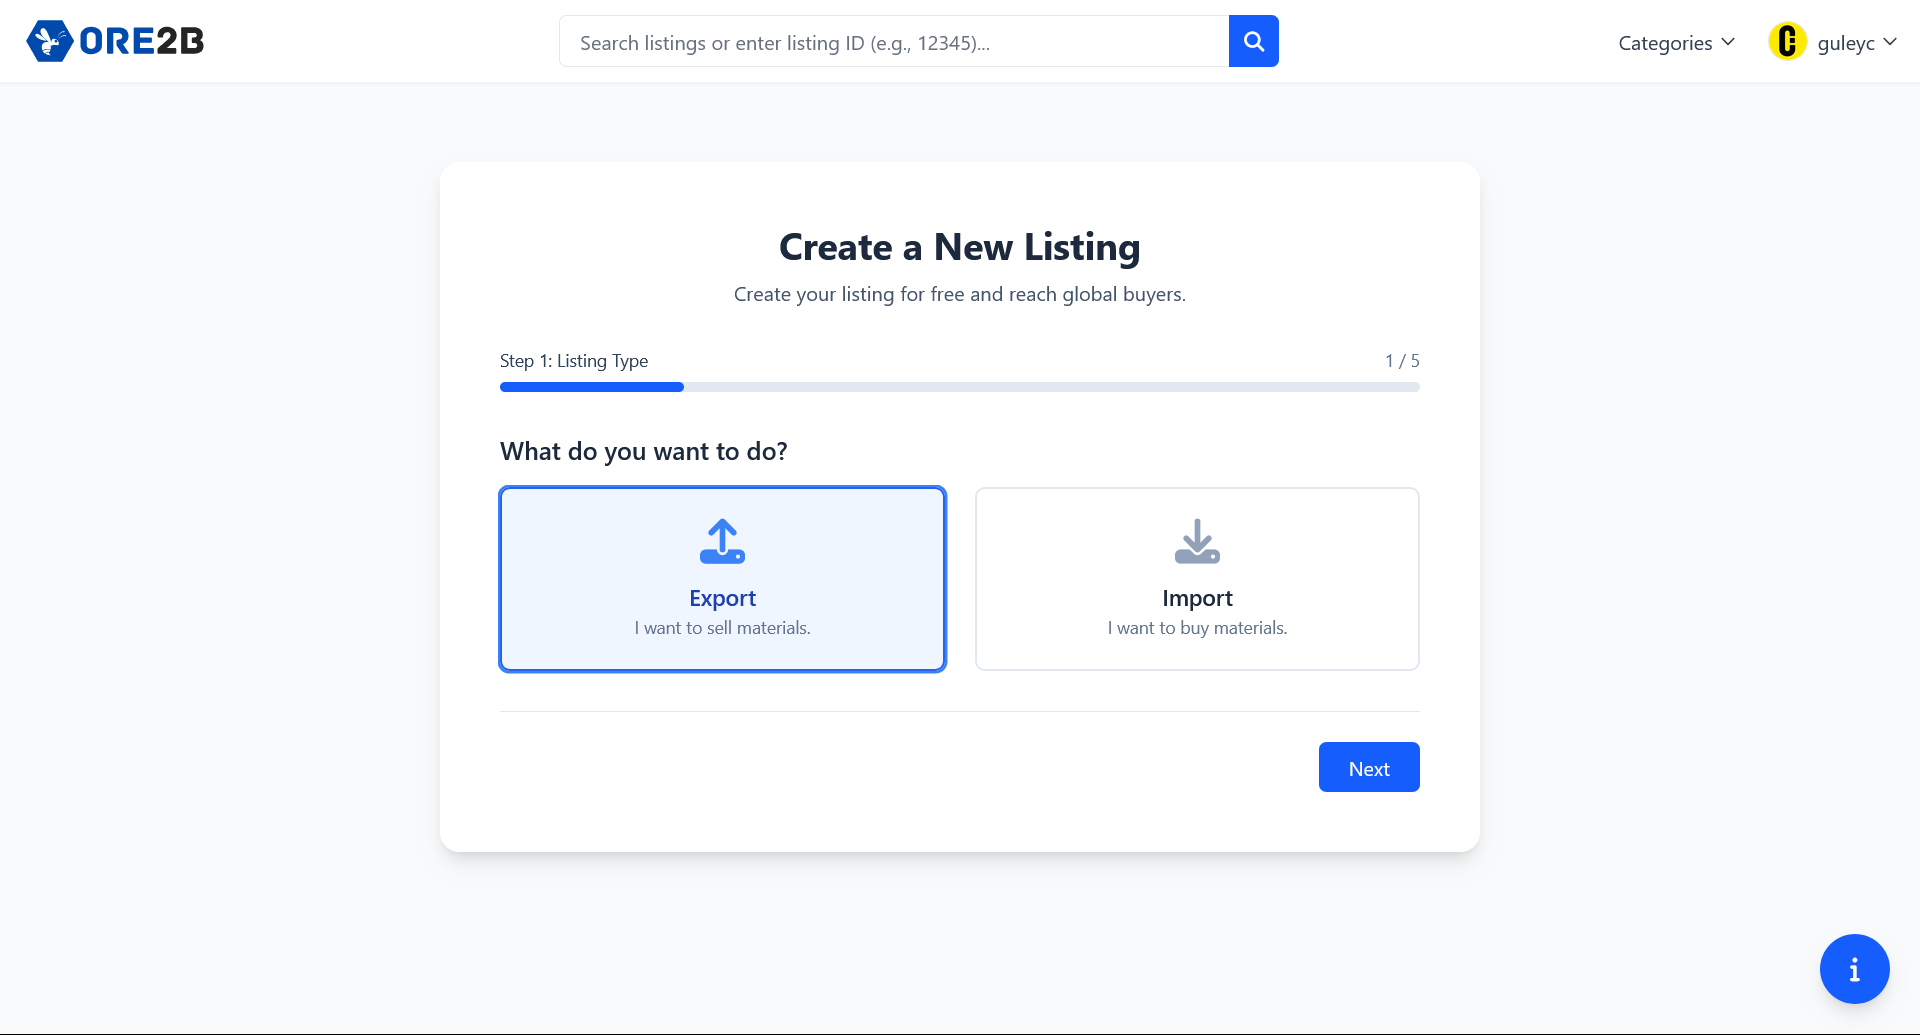
Step 1: Listing Type Selection
On this page, you begin the process of creating a new listing. You will first choose what you want to do. Export: Select this option if you want to sell materials. Import: Select this option if you want to buy materials. After making your selection, click the “Next” button to proceed to the next step. The progress bar at the top shows your current step out of five.
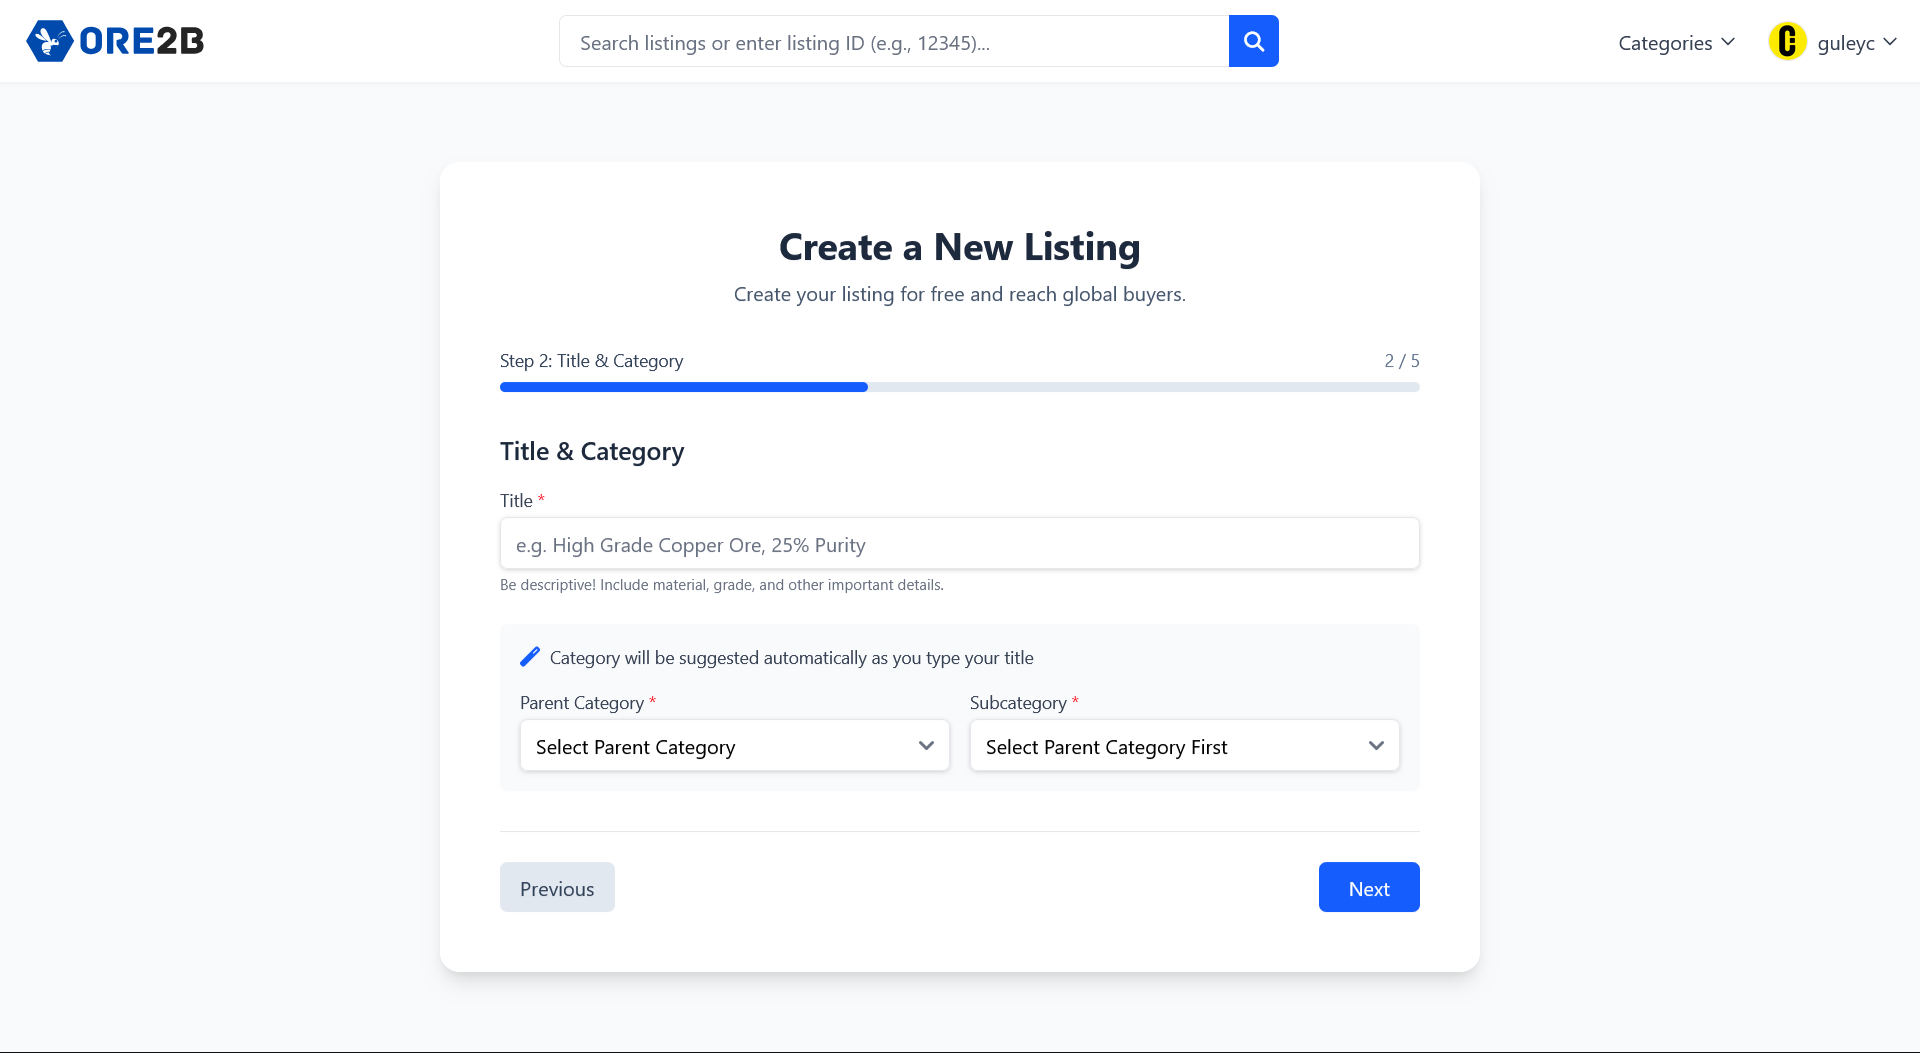
Step 2: Title & Category
In this step, you need to enter a descriptive title for your listing, including material, grade, and other important details. As you type, the system will automatically suggest a category based on your title. Then, select the appropriate parent category and subcategory for your listing. All required fields must be filled before moving forward. Use the “Next” button to continue or “Previous” to go back.
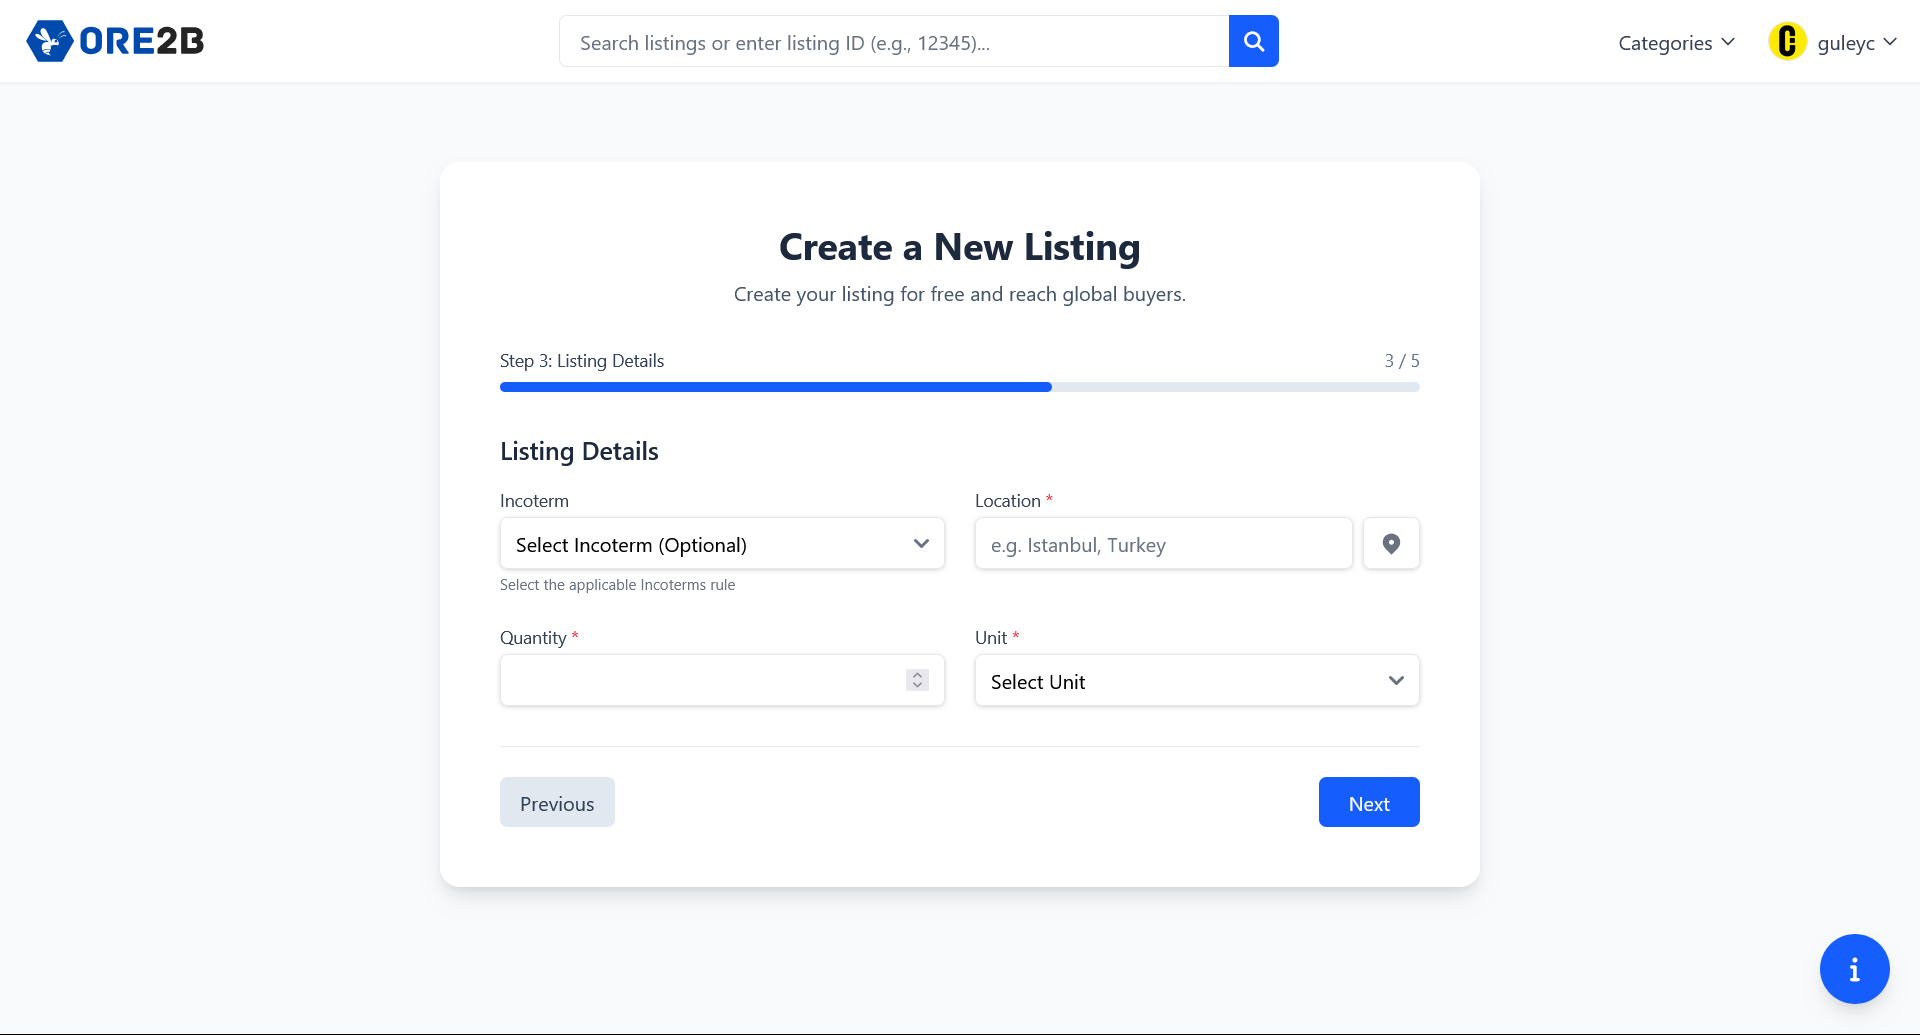
Step 3: Listing Details
Here, you will provide specific details about your listing. Incoterm: Select the applicable Incoterms rule (optional). Location: Enter the location for the listing (required). Quantity and Unit: Specify the quantity and select the unit (both required). Review your information, then click “Next” to continue or “Previous” to return to the previous step.
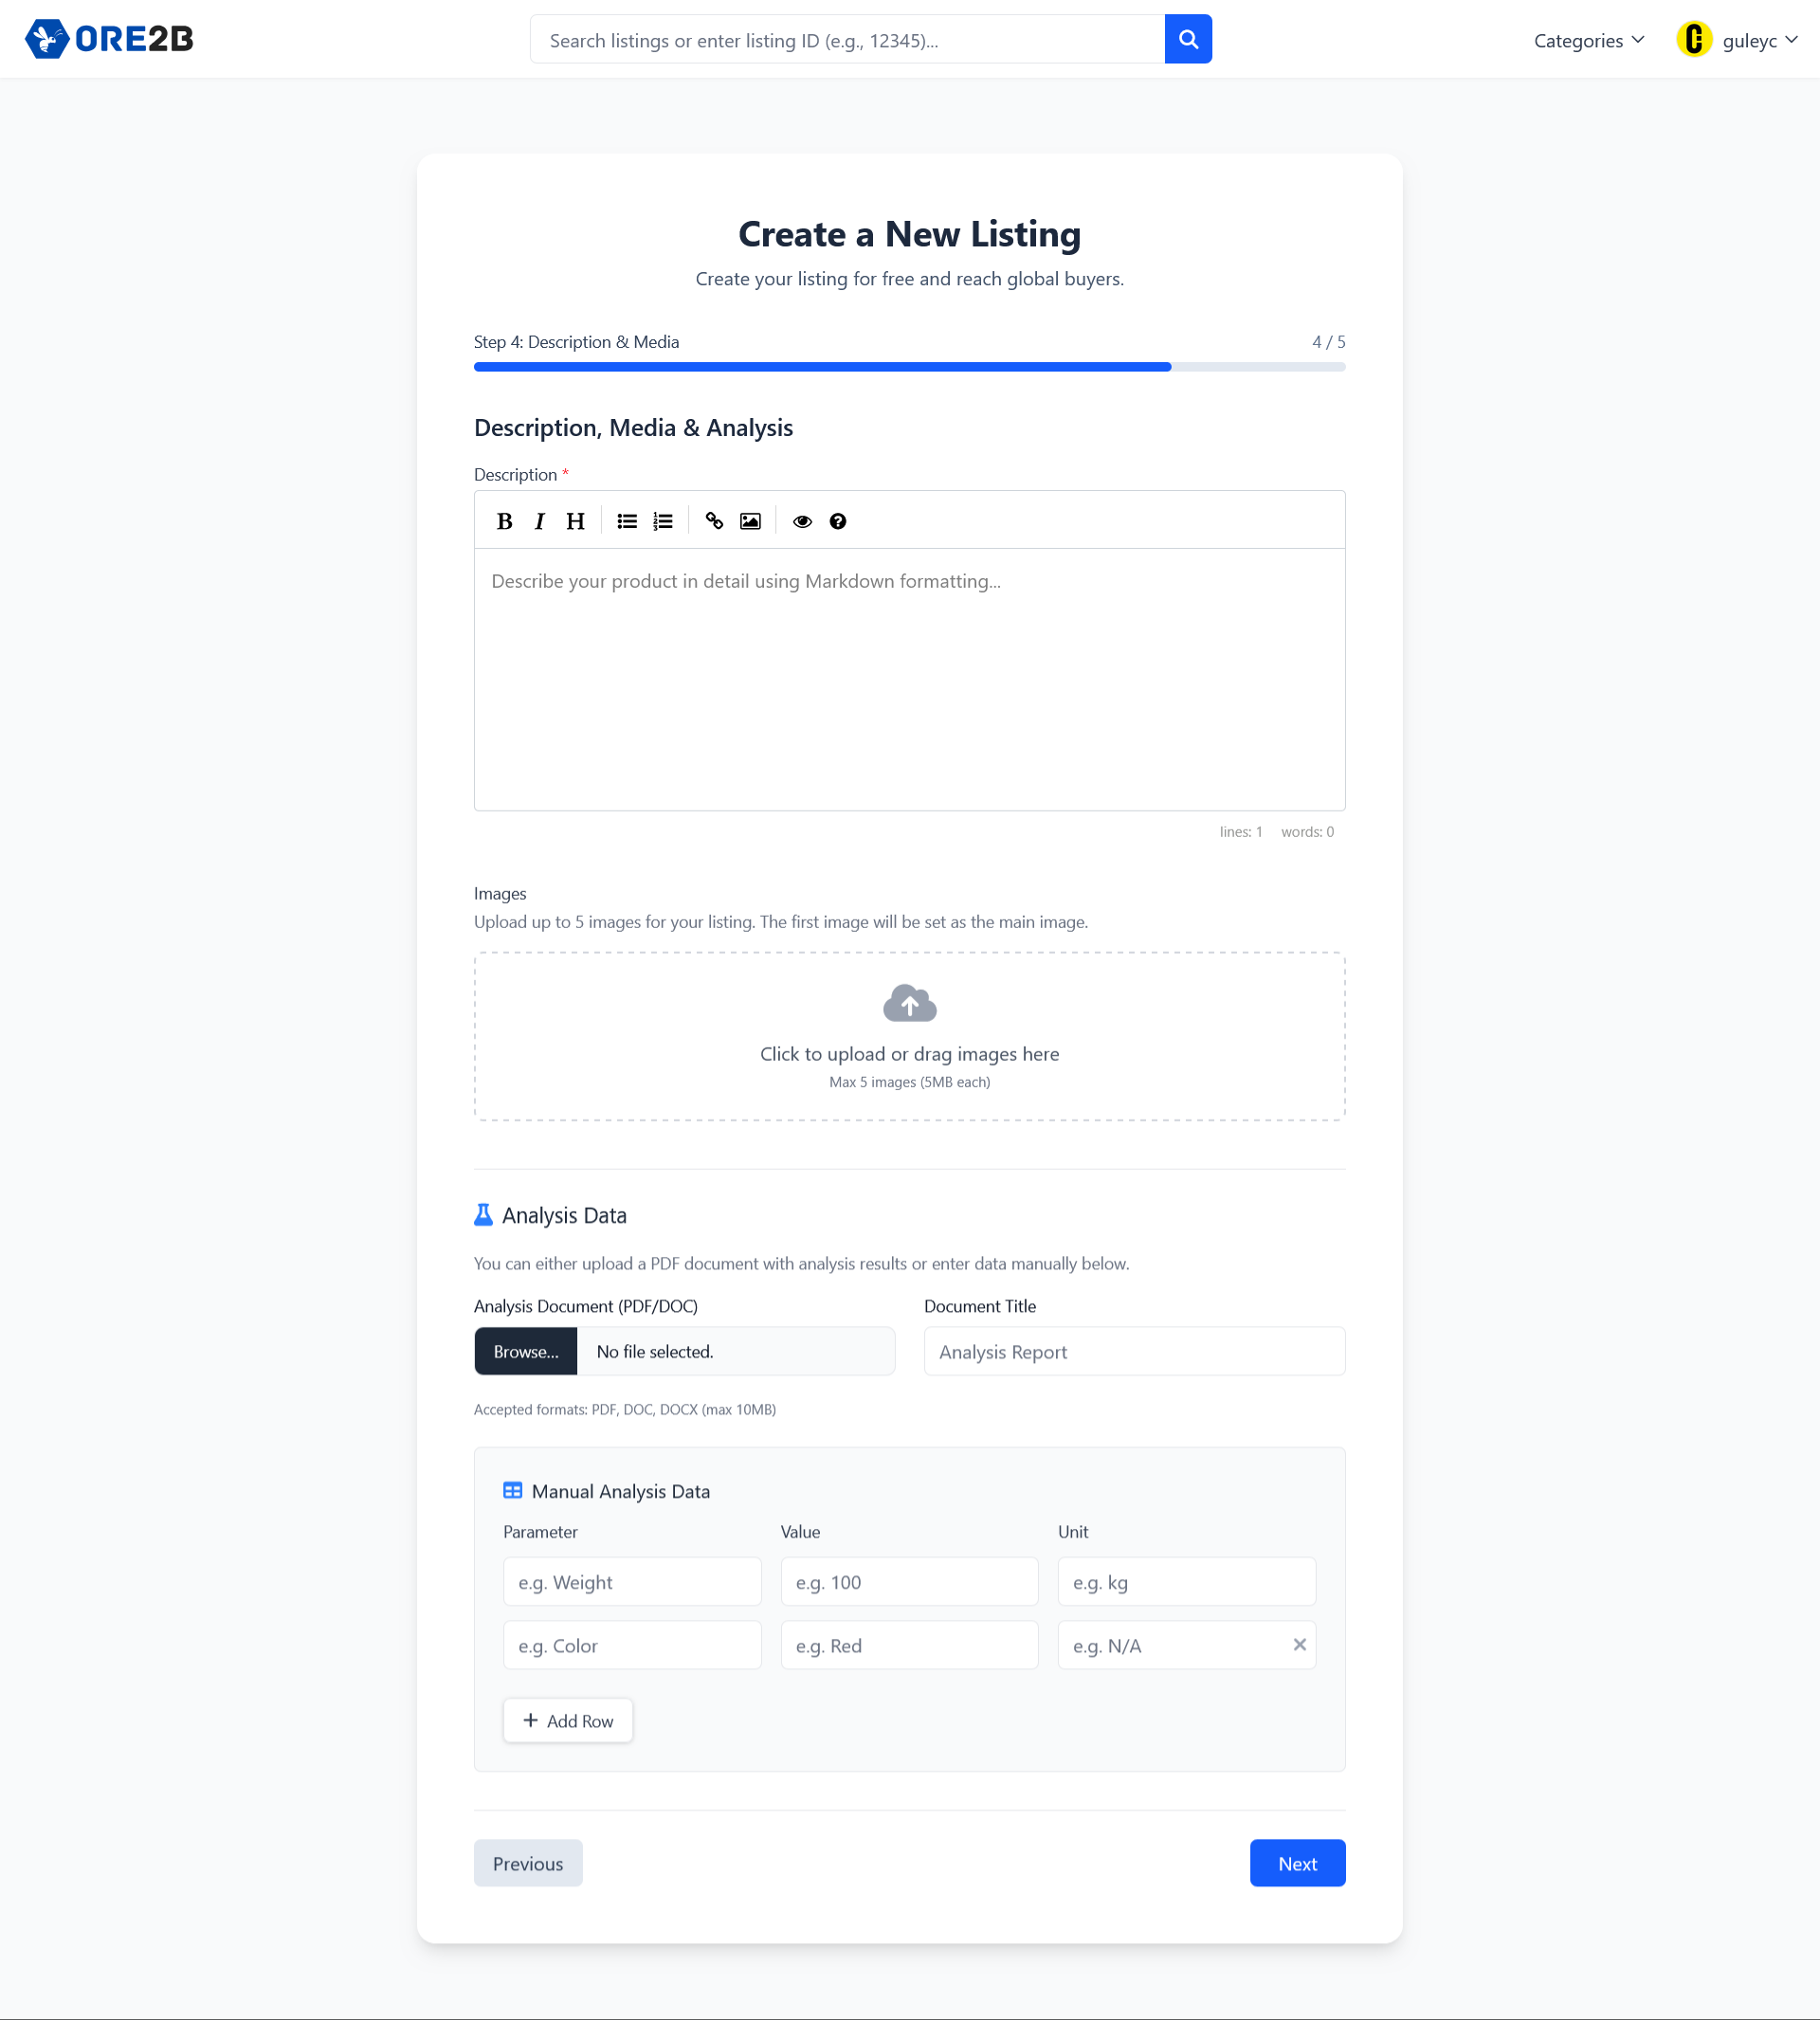
Step 4: Description, Media & Analysis
In this step, you will provide a detailed description of your product using Markdown formatting. You can upload up to 5 images, with the first image set as the main image. Additionally, you can add analysis data by uploading a PDF/DOC report or manually entering parameters (such as weight, color, etc.). Click “Next” to proceed or “Previous” to go back. Ensure all required fields are completed for a successful listing.
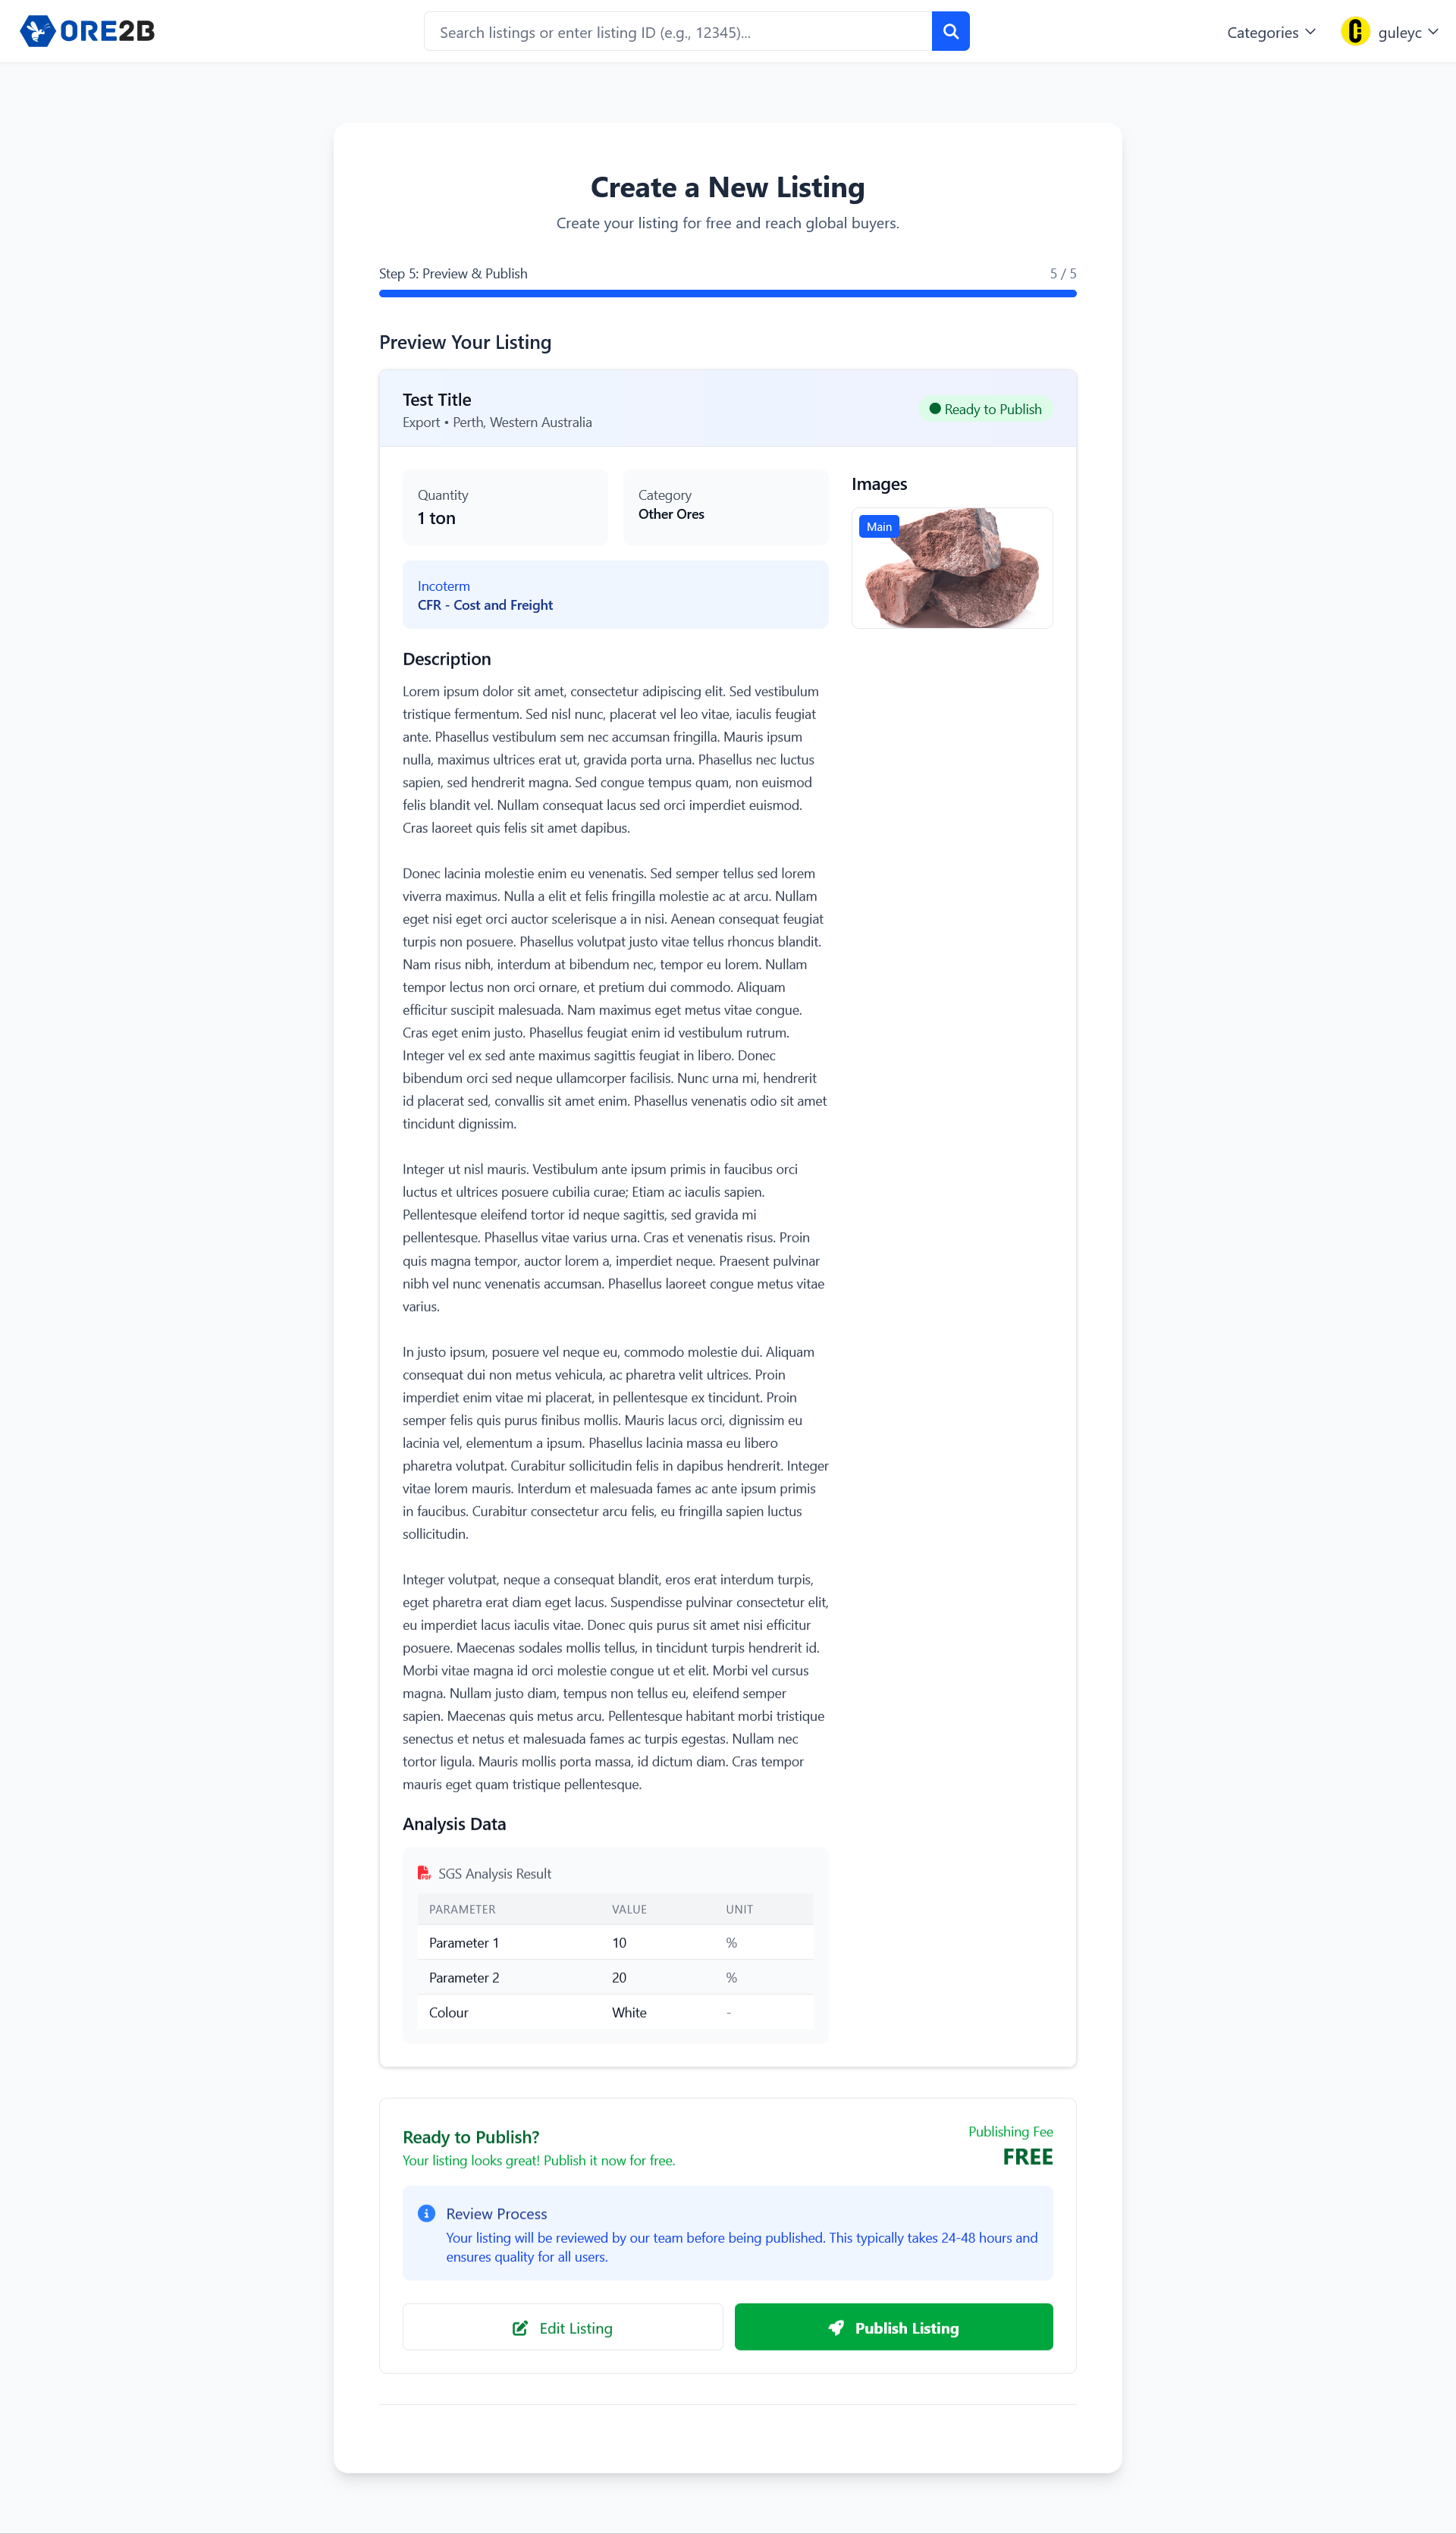
Step 5: Review & Submit
Carefully review your listing details. Once satisfied, submit your listing for approval. Our team will verify and publish it promptly.
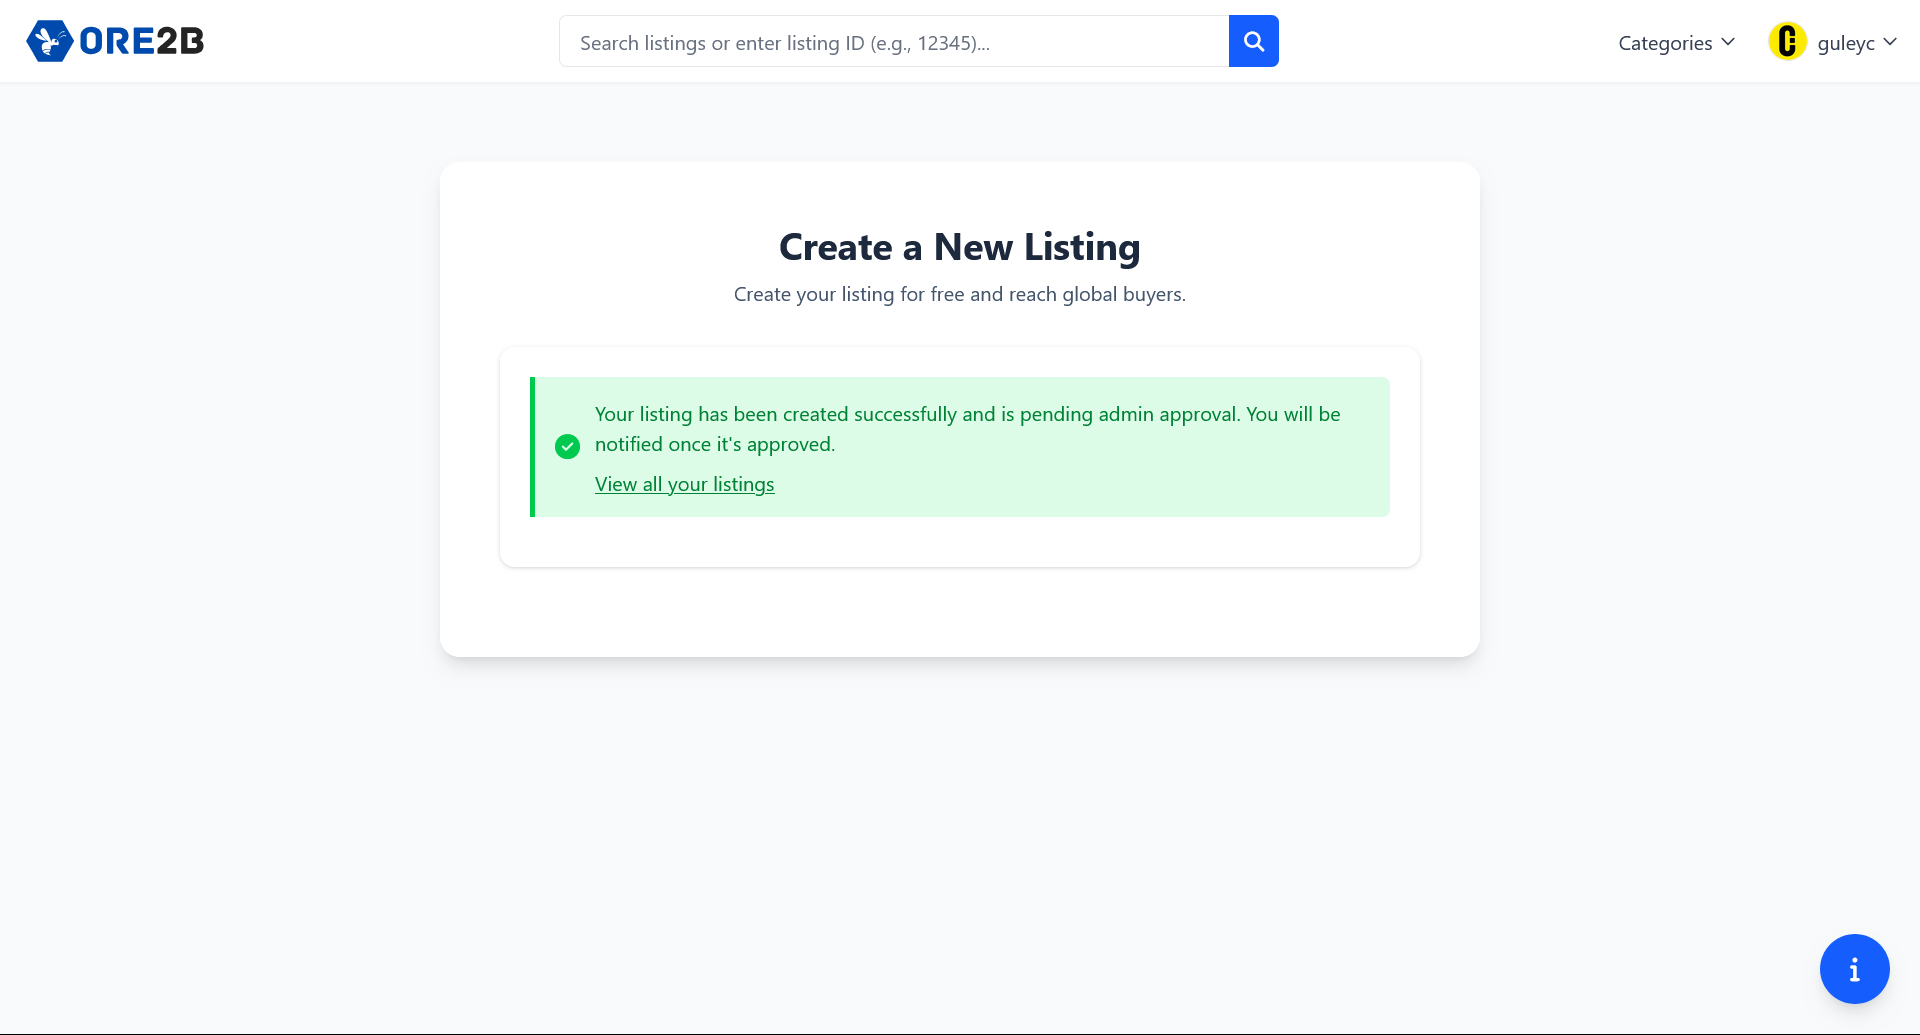
Step 6: Success: Listing Published
Congratulations! Your product is now approval step. Our team will verify and publish it. You can manage and edit your listings anytime through your dashboard.
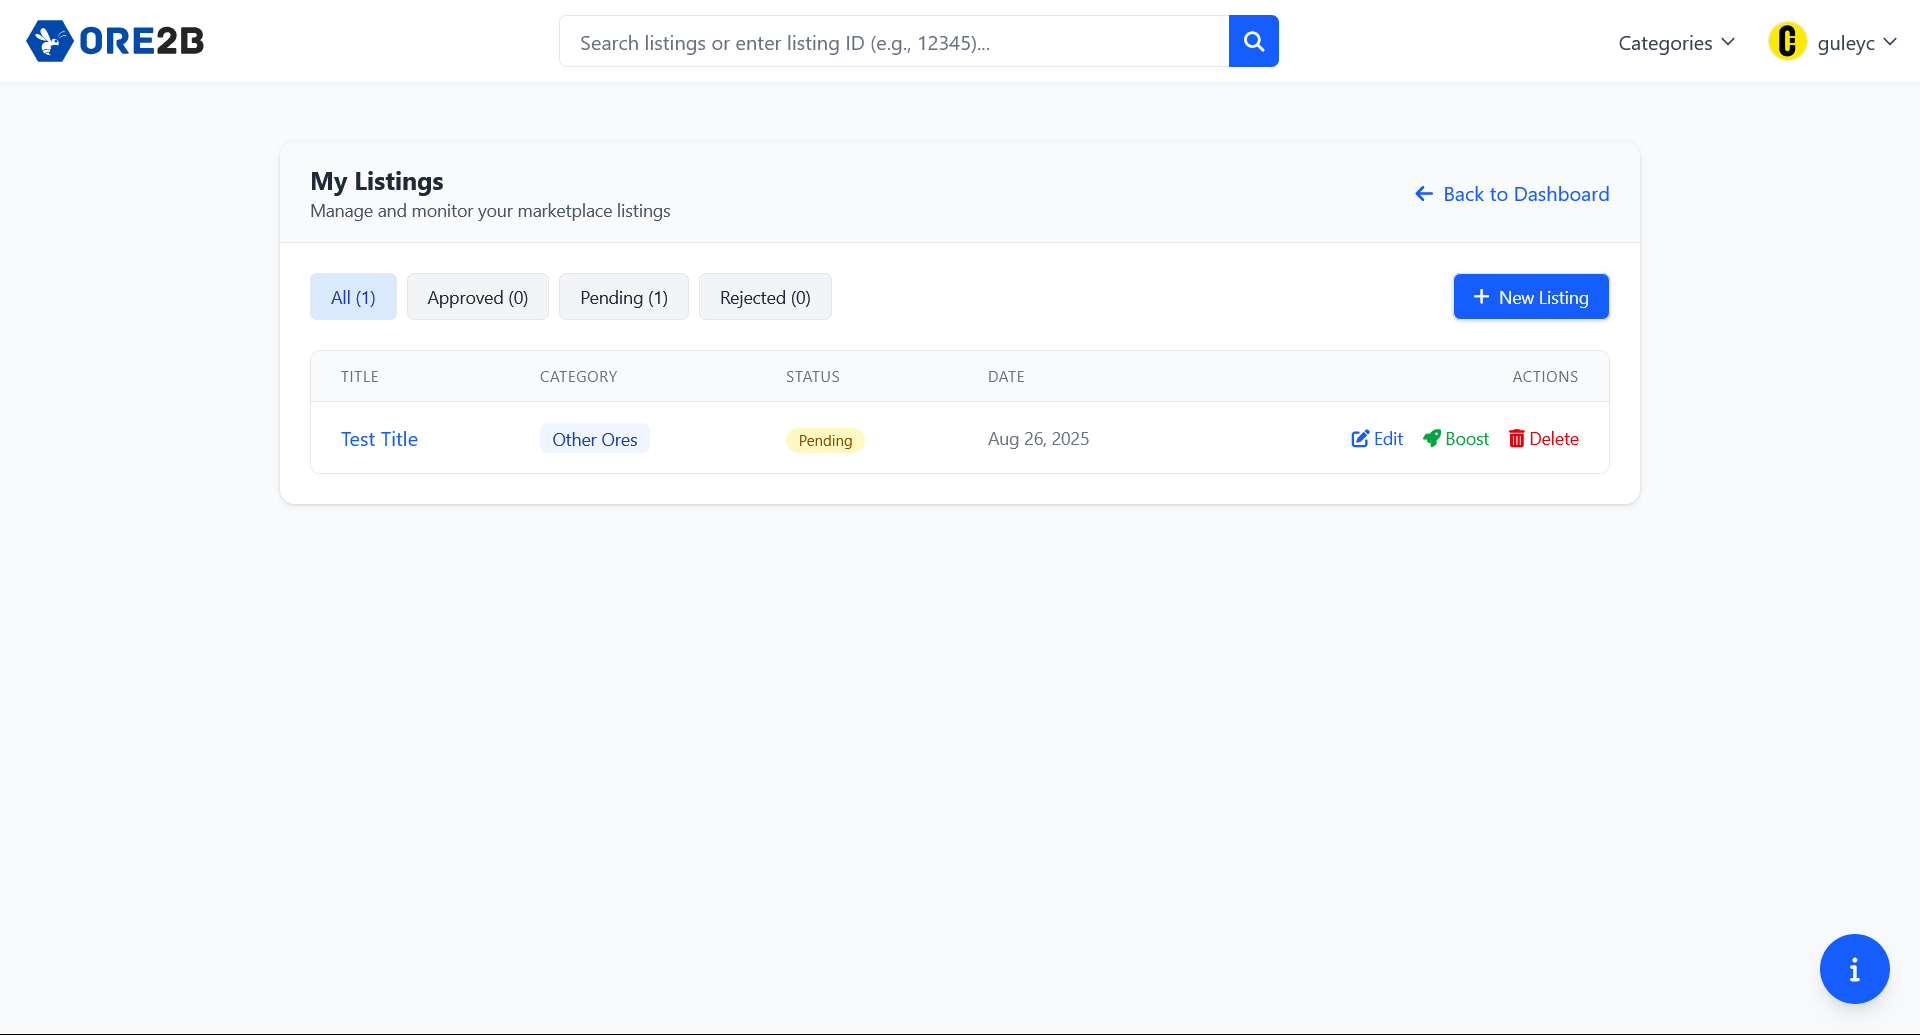
Managing Your Listings
View, edit, or remove your active listings easily from the 'My Listings' page. Stay organized and keep your product offers up-to-date.
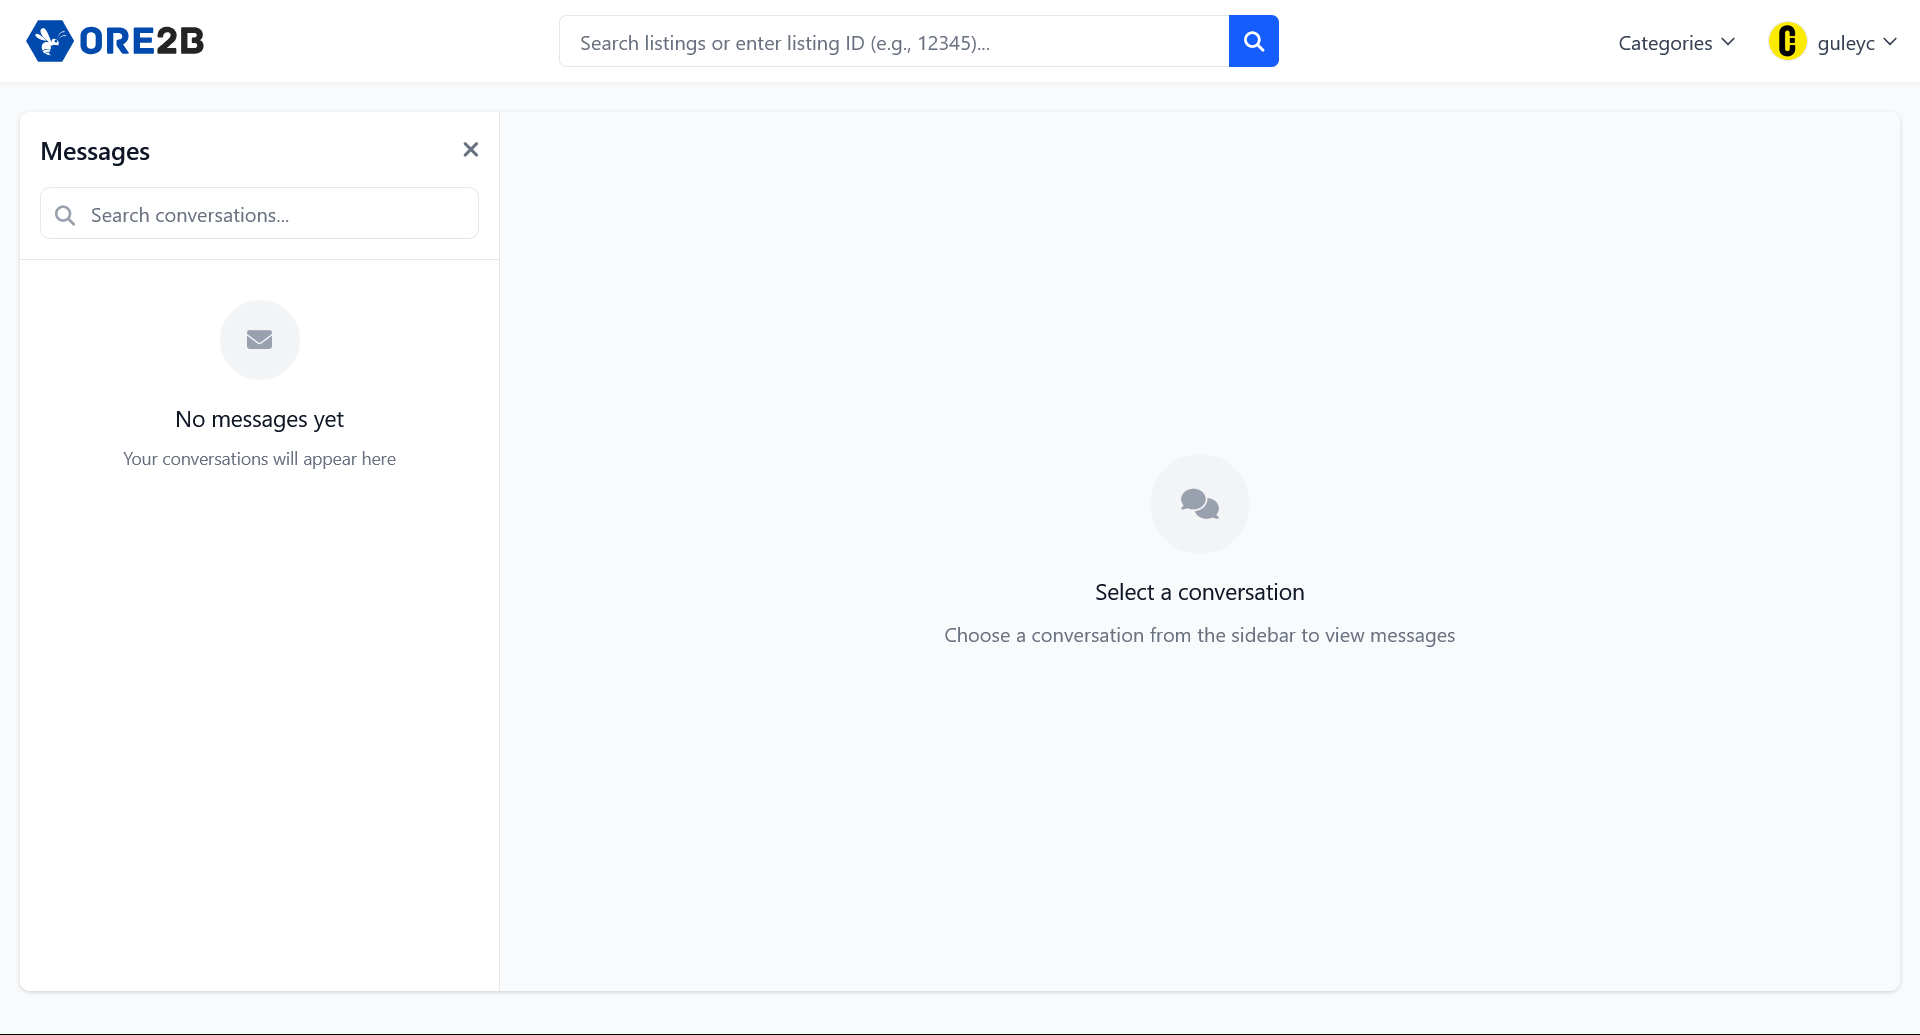
Communicate Securely
Use the secure messaging system to communicate directly with buyers and suppliers. Track your conversations and respond quickly to business opportunities.